Setup Instructions for Facebook Ads
Setup Instructions for Facebook Ads
In this article, we will look at the steps to integrate Facebook Ads with Daton.
Find the links to other articles related to Facebook Ads Below:
- Essential Attributes and Supported Table for Facebook Ads
- Schema Information for Facebook Ads
- FAQs and Release Notes
Prerequisites
- Facebook account
- Read access to the account for daton to fetch data.
Steps to Grant Access to your account:
The owner needs to grant access to your account(one you'll use for facebook authentication) for Daton to fetch data from your account. Below are the steps to do so:
- Log In to Meta Ads Manager:
- Go to the Meta Ads Manager.
- Log in using your Facebook credentials.
- Check the Account Dropdown:
- In the top left corner of the Ads Manager, look for the dropdown menu listing the ad accounts associated with your user.
- Click on the dropdown to view all the ad accounts available to you.
- Confirm Your Role:
- Ensure you have the correct role within your business account.
Note: Only users with Admin or Advertiser roles can view and manage campaigns. - Request Access:
- Via Business Manager:
- Go to Meta Business Suite and log in.
- Click on the Settings icon in the bottom left corner.
- In the Business Settings menu, click on Accounts and then select Ad Accounts.
- Select the ad account you need access to and click Assign Partners or Assign People.

- Enter your email address or Facebook username and assign the appropriate role (Admin, Advertiser, Analyst).
- Via Ad Account Admin:
- Contact the admin of the ad account and ask them to add you.
- They need to go to the Ad Account Settings and add you with the required permissions.

- Via Business Manager:
- Verify Invitations:
- If you've been invited to an ad account, you should receive a notification on Facebook.
- Go to your Notifications and accept the invitation.
- Alternatively, go to Business Settings > "Requests" to view and accept any pending invitations.
Setting Up the Integration
1. Sign in to Daton and select Facebook Ads from the source integrations page.
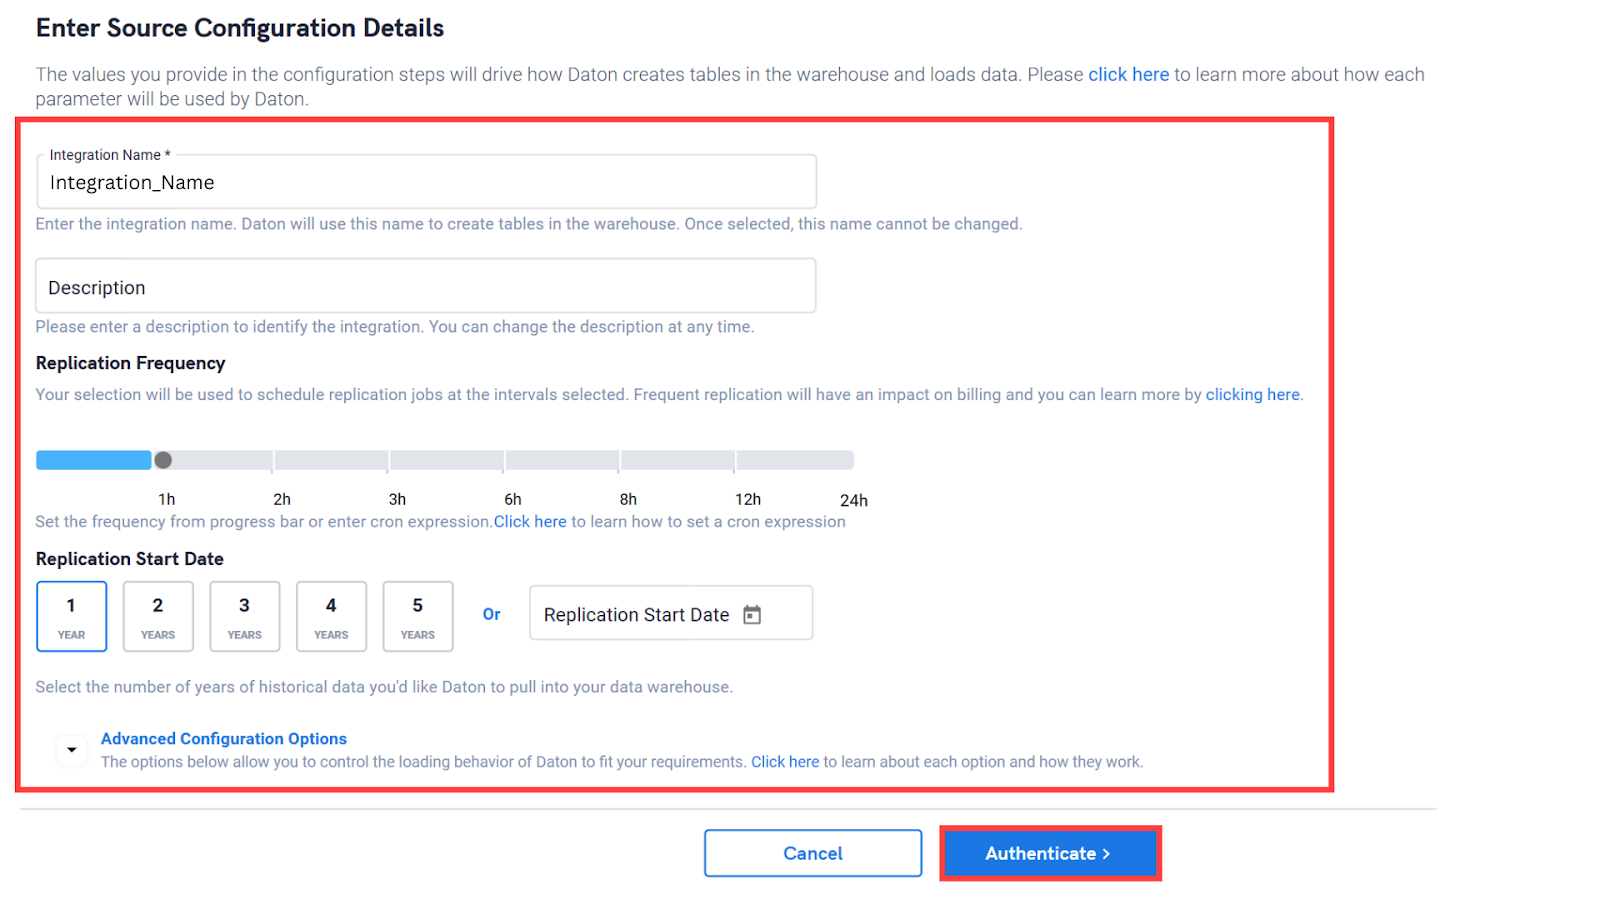
2. Provide Integration Name, Replication Frequency, and History. The integration name would be used in creating tables for the integration and cannot be changed later.
3. You will be redirected to the Facebook Ads login to authorise Daton to extract data periodically.
4. Post successful authentication, you will be prompted to choose from the list of available Facebook Ad accounts.
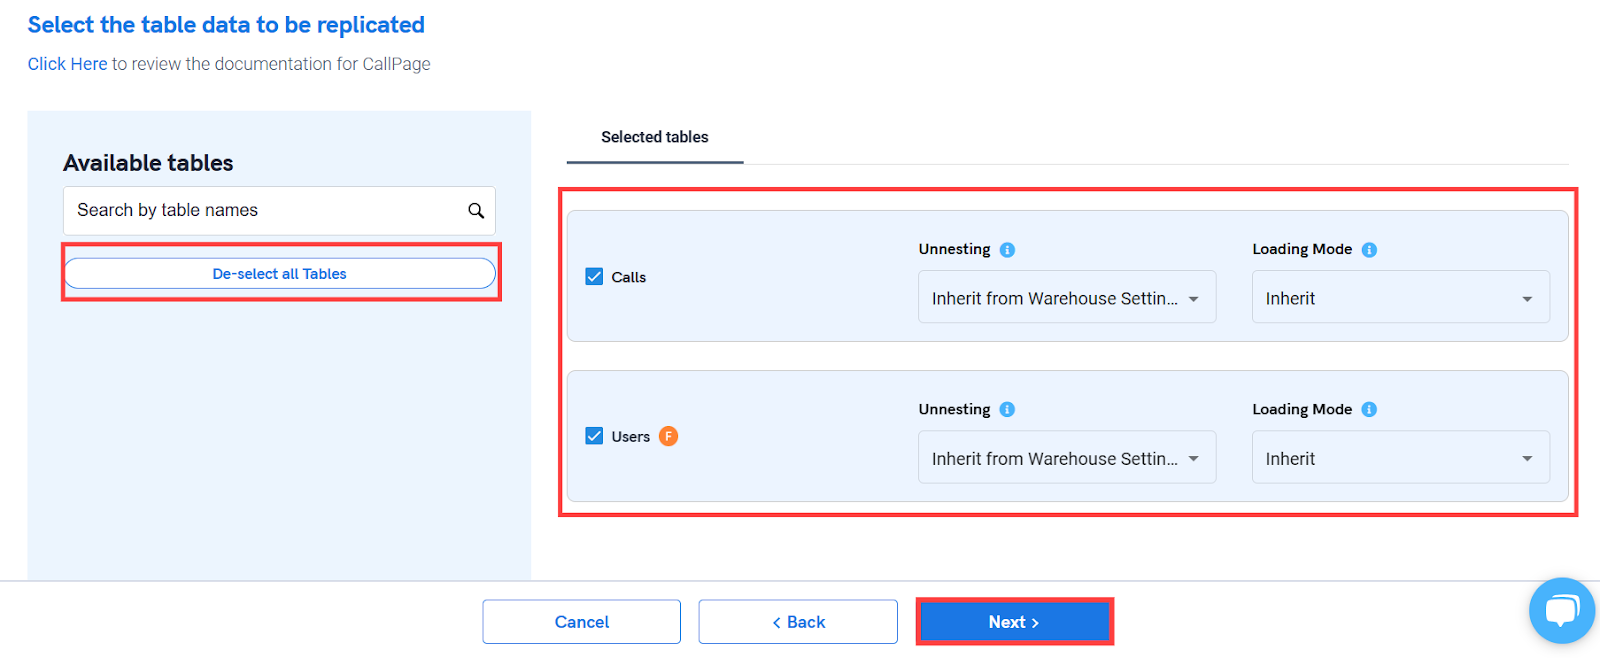
5. Select the required tables from the available list of tables.
6. Then select all required fields for each table.
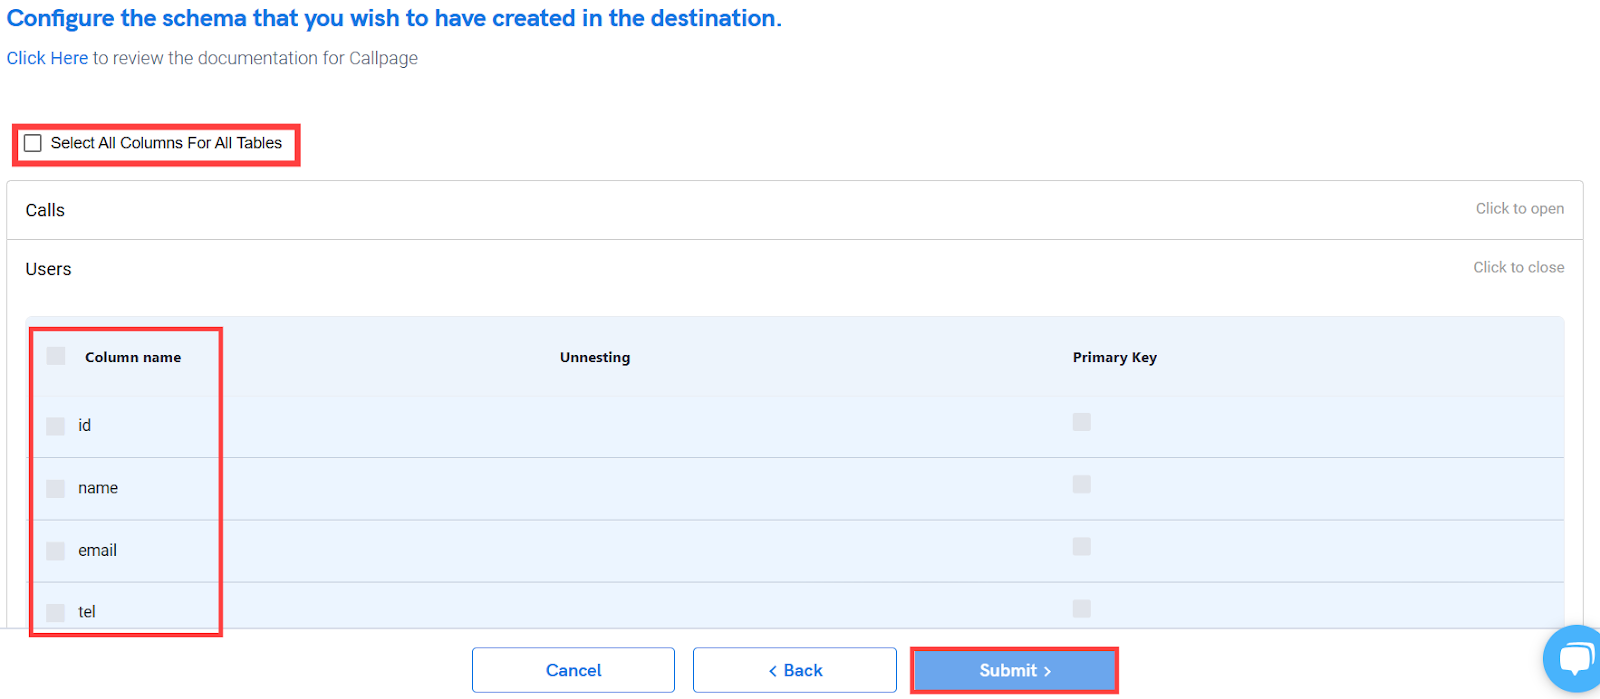
7. Submit the integration
Workflow
1. Integrations would be in Pending state initially and will be moved to Active state as soon as the first job loads data successfully on to the configured warehouse
2. Users would be able to edit/pause/re-activate/delete integration anytime
3. Users can view job status and process logs from the integration details page by clicking on the integration name from the active list