Notification Settings
Discover how to customize and manage your notification preferences in order to stay informed and organized according to your personal preferences.
Notification Settings
Discover how to customize and manage your notification preferences in order to stay informed and organized according to your personal preferences.
In Daton, notifications play a crucial role in keeping you informed about important activities within your account. They are automatically-generated emails that provide updates and insights according to your preferences. By customizing your Notification Settings, you can ensure that you receive only the updates that matter most to you.
In Daton the notification settings are categorized into two main parts:
- Preference: This allows you to receive personalized email notifications related to Integrations, Warehouses, Rows processed, Subscription, Monitoring, and User management.
- Data Delay: By enabling this option for specific integrations, you receive real-time alerts in the Daton's Alerts interface and personalized emails regarding any data delays.
Read our article Daton Alerts to know more about it.
Locating Notification Settings in the Daton Interface
Follow the following steps to locate notification settings in your Daton account:
-
Log in to your Daton account and Navigate to the Account Settings.
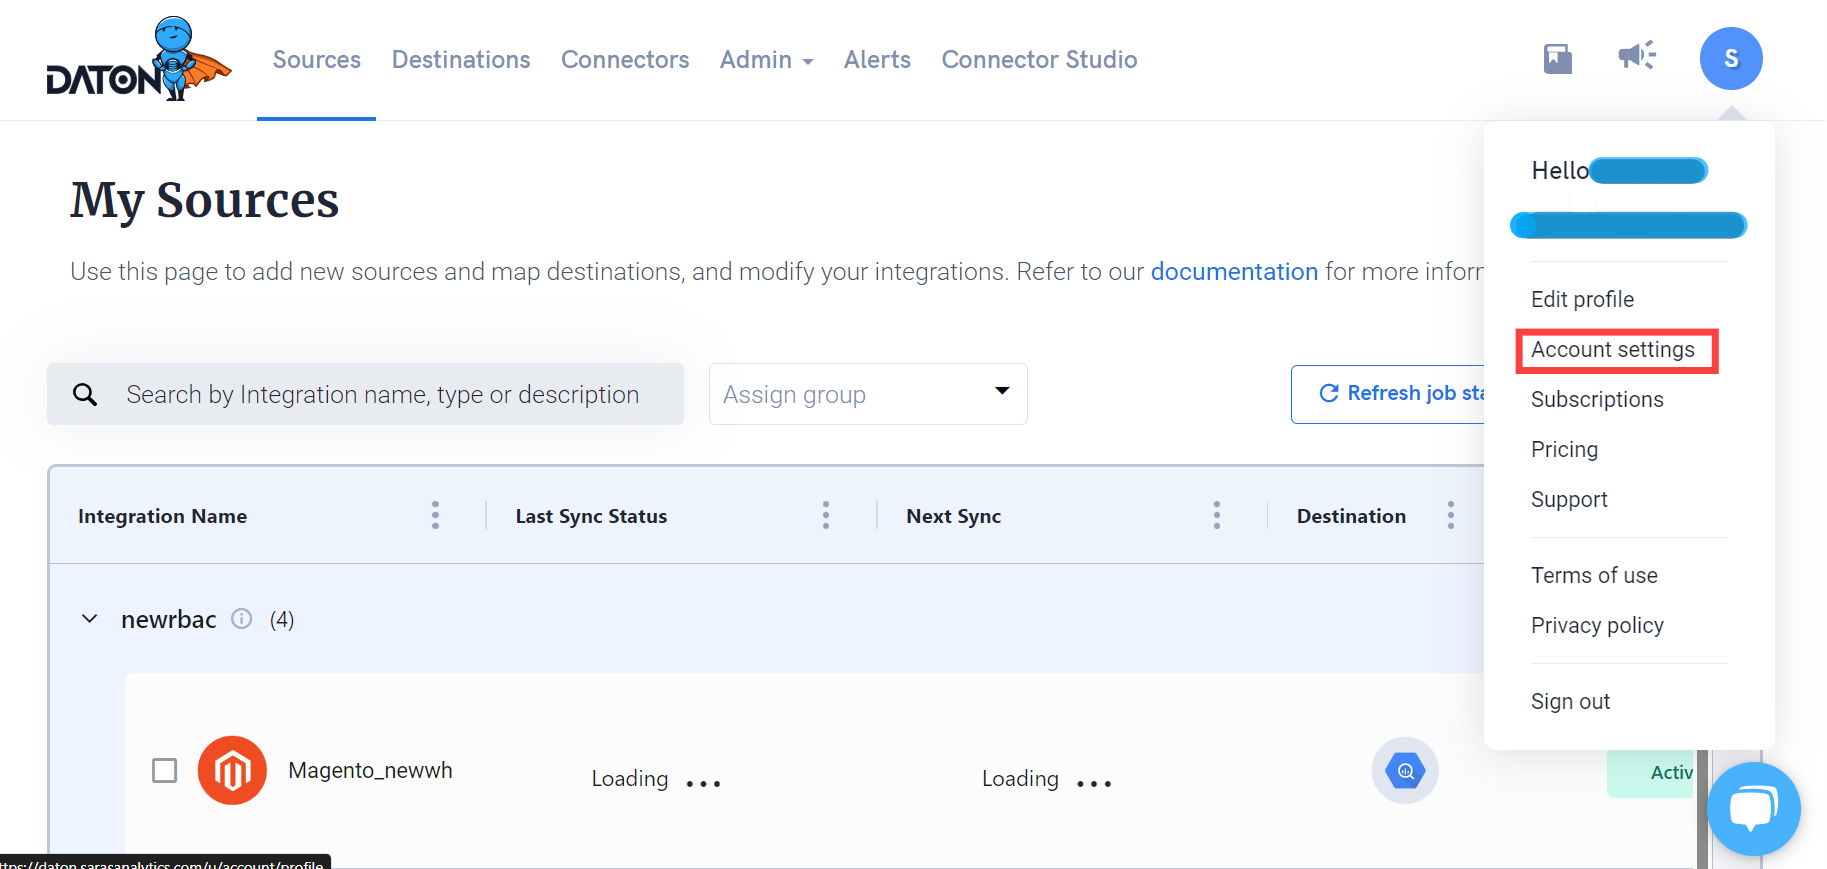
- In the Account settings, you will find the Notification Settings on the left menu panel.
- Click on Notification Settings and proceed to configure your preferences.
Setting up Notifications
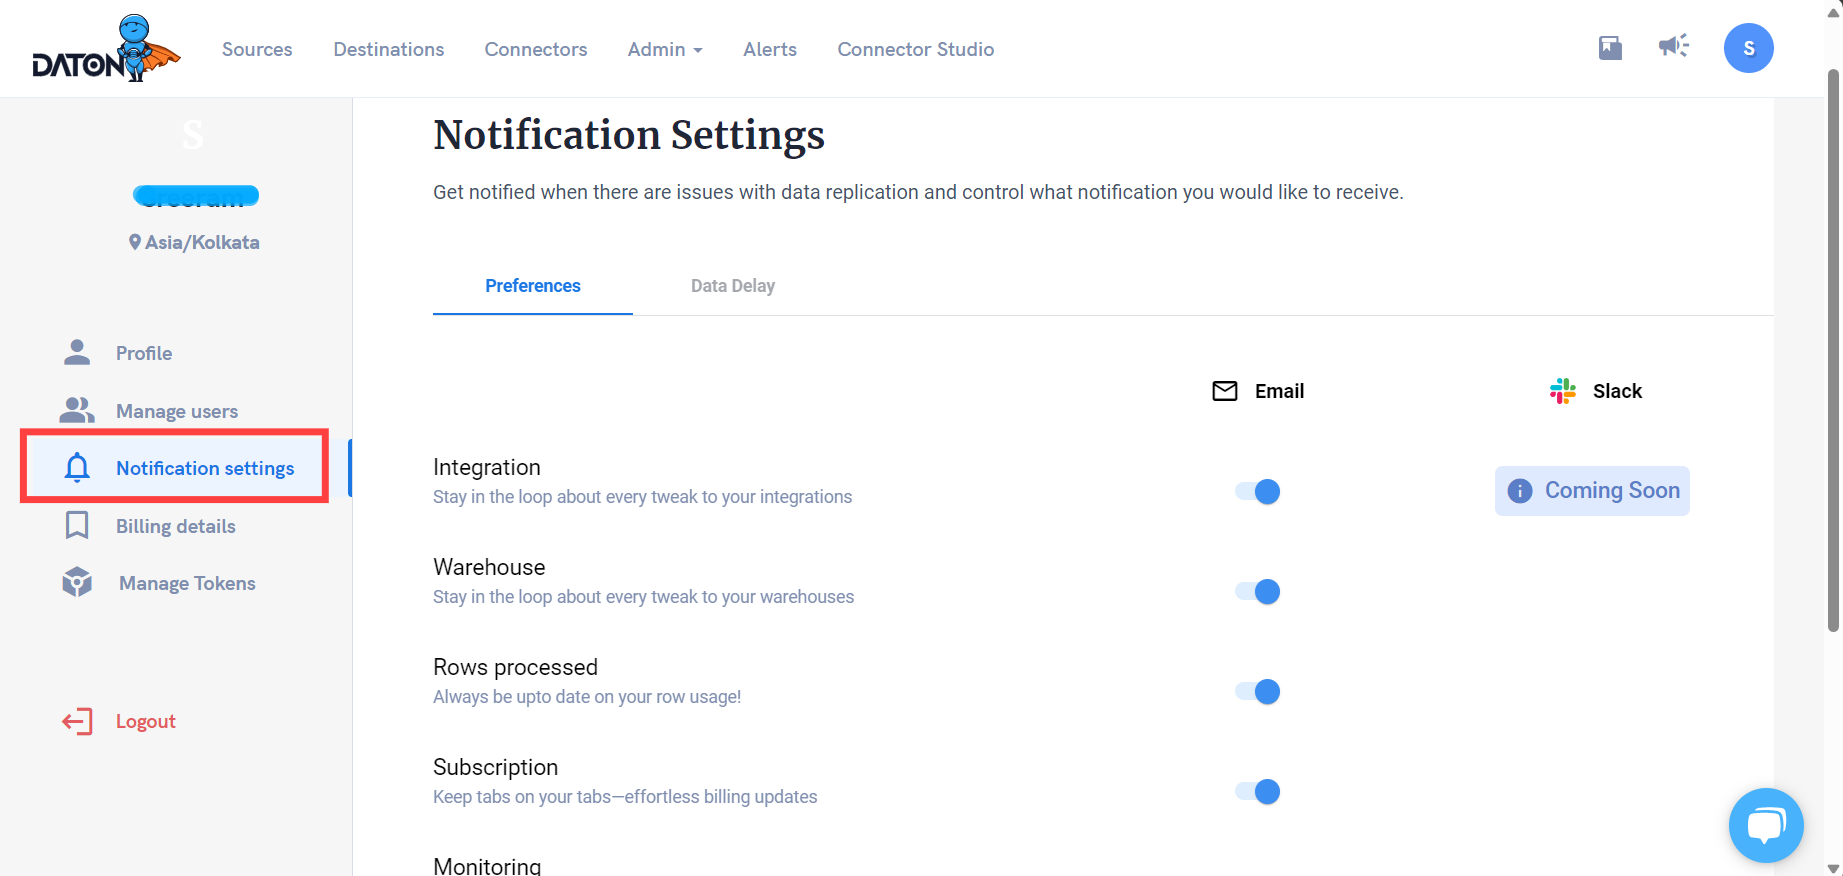
Preferences
Daton offers a range of notification preferences that can be easily activated or deactivated using toggle buttons. Enabling these preferences ensures you receive timely email notifications for respective aspects of your Daton account.
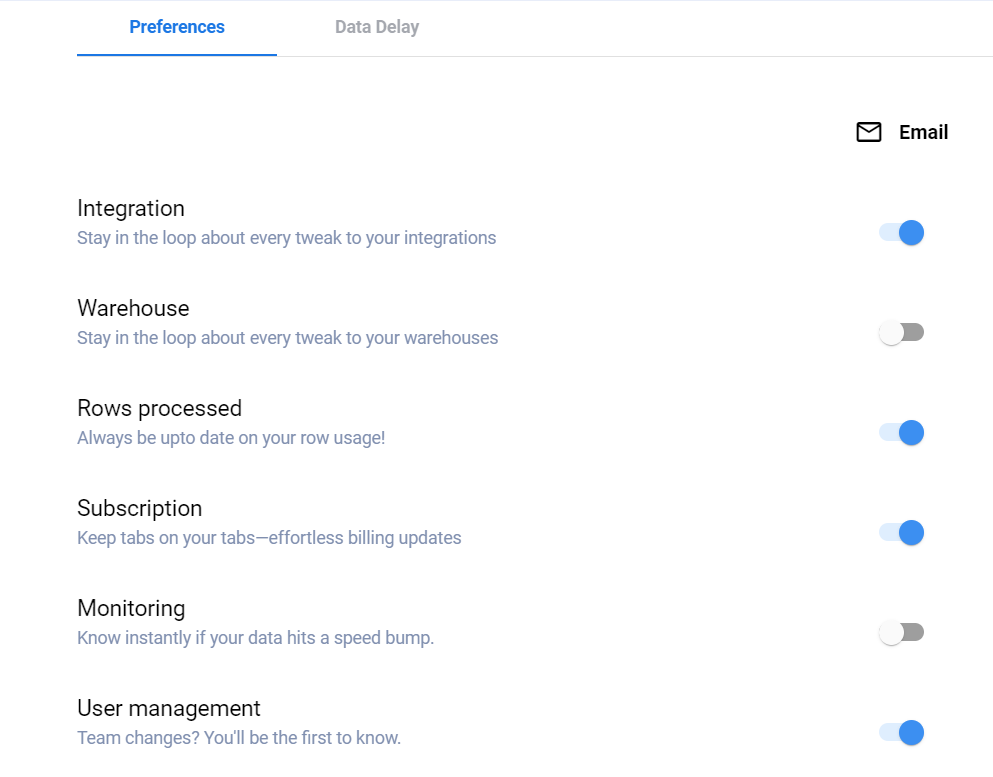
Following are the range of Preferences Daton allows and their meanings:
- Integration: Email notification for any changes or adjustments that are made to their integrations within the Daton platform.
- Warehouse: Email notification for any modifications made to their warehouses in the Daton system.
- Rows processed: Email notification for this for the usage and processing of rows within their datasets on Daton.
- Subscription: Email notification for billing changes or updates to their subscription plans.
- Monitoring: Email notification for any disruptions or issues that affect the speed or integrity of their data within Daton.
- User management: Email notification for any alterations or updates made to the team structure or user management settings within their Daton account.
Configure these preferences according to your needs to ensure you are always in the loop and receive timely updates about necessary aspects of your Daton account.
Data Delay
Data Delay notifications are integration-specific alerts. Activating Data Delay for an integration enables you to receive real-time email notifications and an overall view of all your errors across all integrations in the alerts panel. It's important to note that this feature applies only to the Active integrations in your Daton Account, meaning integrations that are not paused or deleted.
Activating Data Delay Notifications:
Daton offers you the scope to turn on these notifications for each individual integration, by source type as well as by warehouse type.
Activating Data Delay Notifications Individually
Steps to activate Data Delay Notifications individually:
- On the Notification Settings page, click the Data Delay tab.
- In the search bar, type the specific integration name or source ID for which you want to receive the alerts.
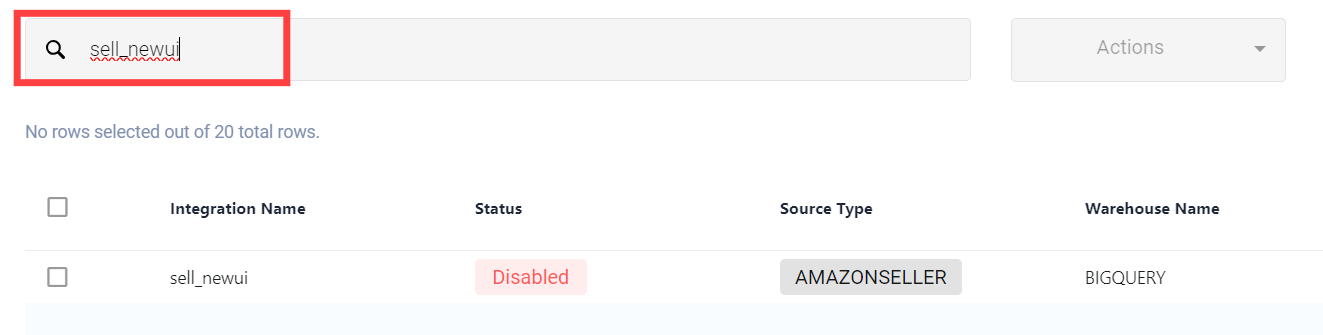
- Select the desired integration, click on the Actions dropdown list, and select Activate.
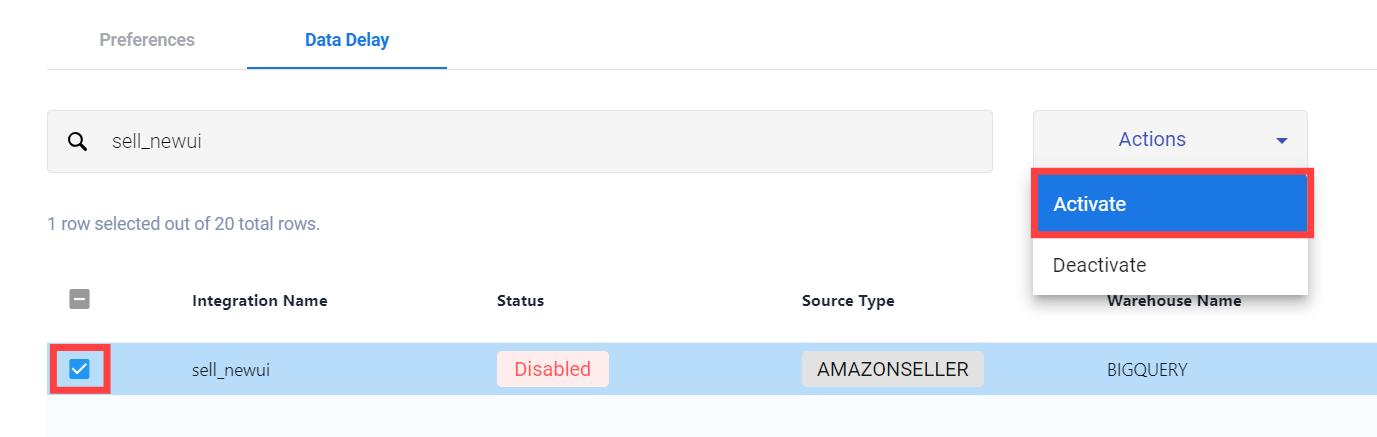
- You will receive a popup that says Status Changed Successfully and will observe the status updated as Enabled in the UI.
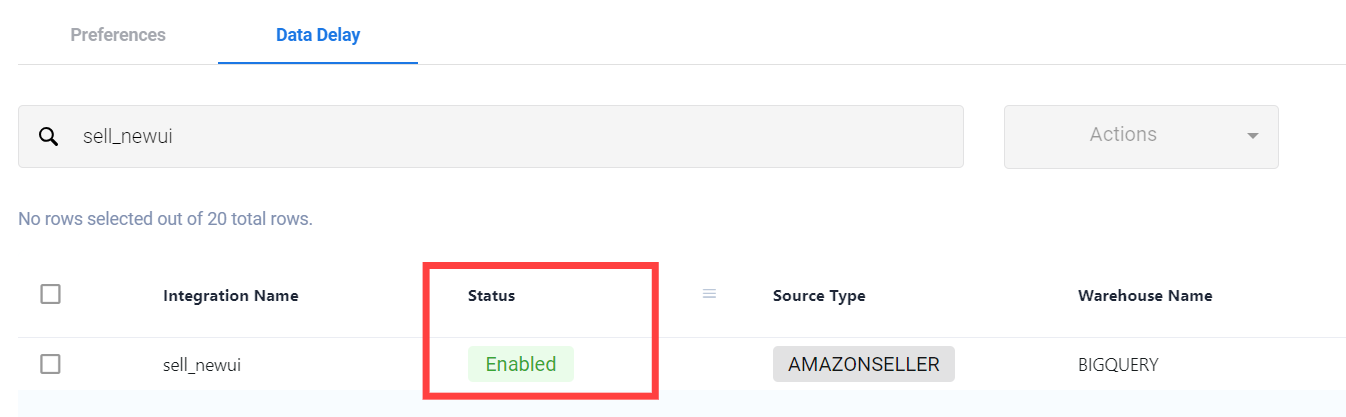
You will now receive real-time email notifications corresponding to this integration and the same will be reflected in the Alerts panel.
Activating Data Delay Notifications in Bulk
The bulk activation process in Data Delay eliminates the need for manual activation by selecting multiple integrations and provides enhanced customization options. Data Delay Notifications can be conveniently activated in bulk through two methods:
- Selecting multiple integrations manually
- Selecting multiple integrations using filter
Rather than manually activating notifications for each integration individually, the bulk activation option allows you to select multiple integrations at once, saving time and effort. Additionally, the ability to filter by Source Type and Warehouse Type further enhances the process by enabling you to target specific integrations for notification activation and makes sure that no integration is missed.
By Selecting Multiple Integrations Manually
Steps to activate Data Delay Notifications By Selecting Multiple Integrations Manually:
- On the Notification Settings page, click the Data Delay tab.
-
Select all the integrations you desire to activate Alert notifications for, open the Actions dropdown, and hit Activate.
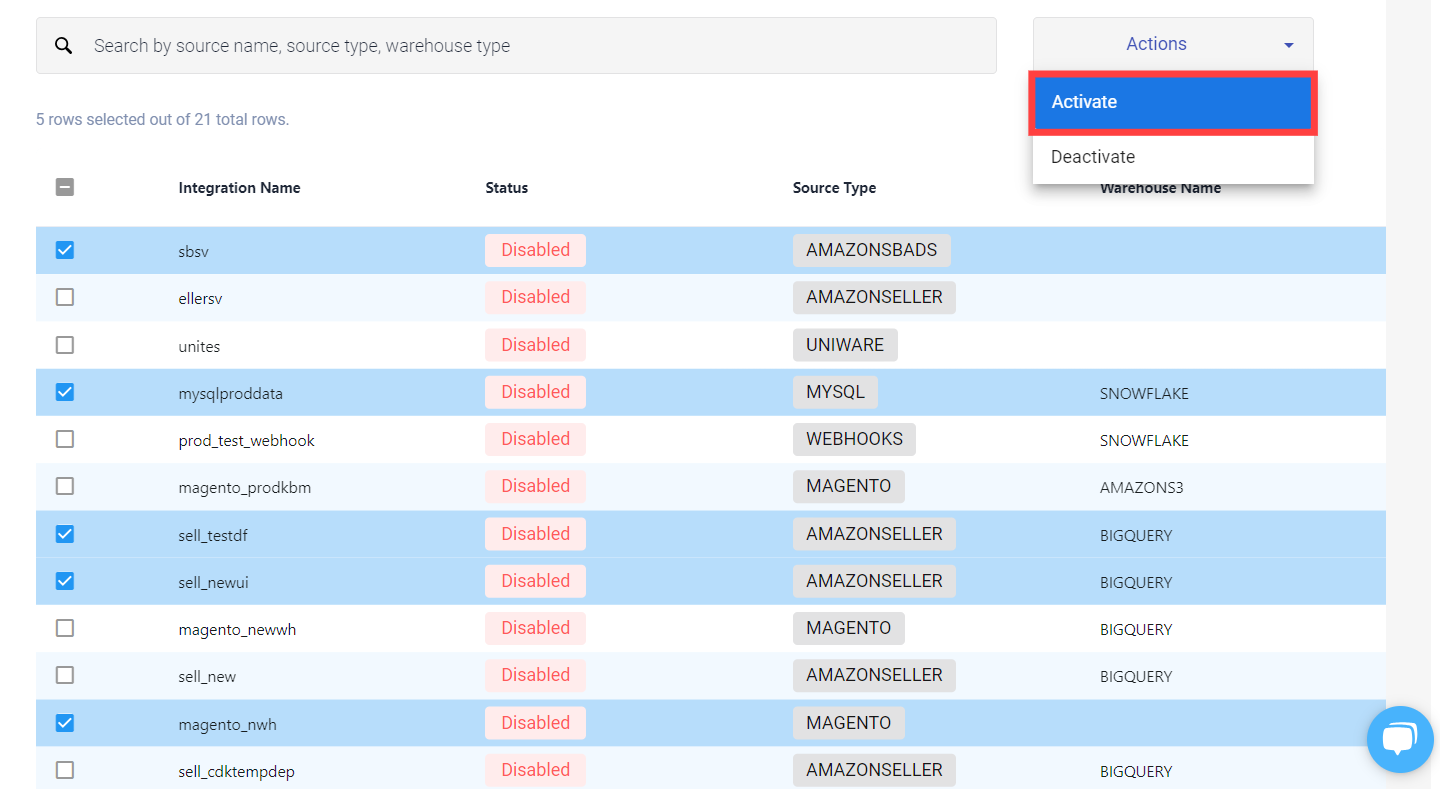
- You can also select all the active integrations if desired.

- You can also select all the active integrations if desired.
- You will receive a popup that says Status Changed Successfully and will observe the status updated as Enabled in the UI.

You will now receive real-time email notifications corresponding to these integrations and the same will be reflected in the Alerts panel.
By Selecting Multiple Integrations Using Filter
The integration selection in Data Delay settings has an interesting feature that allows you to target specific integrations while activating them. To perform this you may require the integration name, source or warehouse type, or combination of any two or more of them.
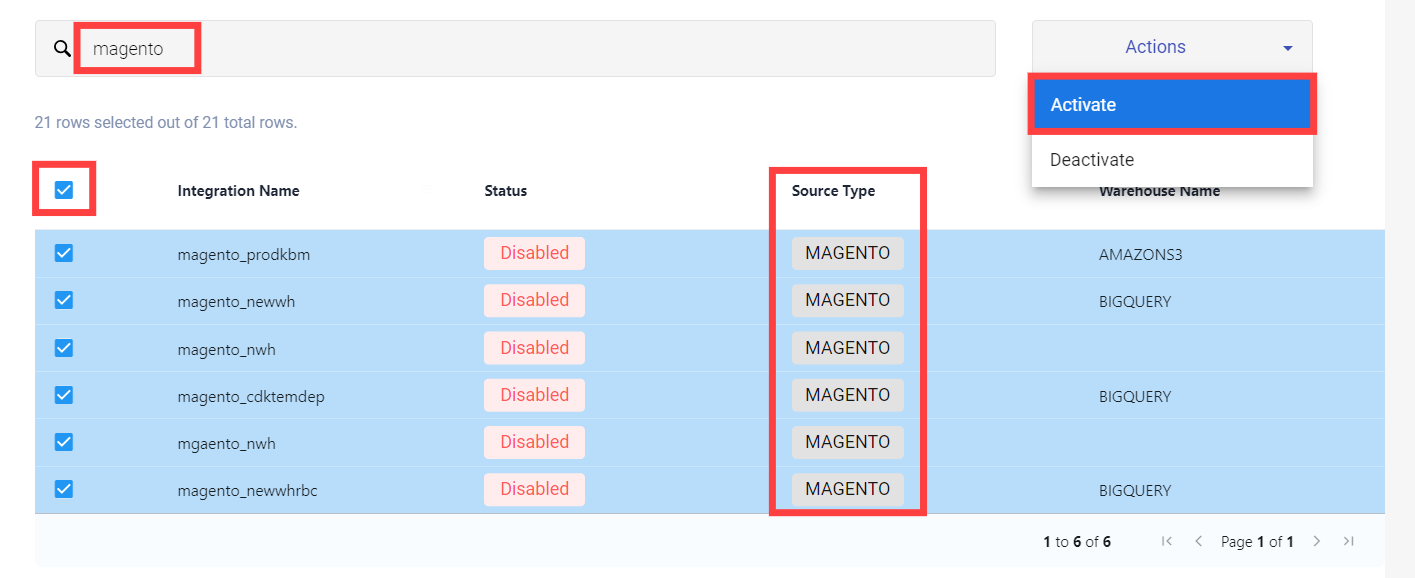
Filtering by Source Type
This action is performed when you need Alert notifications for all the active integrations of a particular Source Type.
- This can be performed by typing the desired Source Type in the search box at the top of the Data Delay Tab on the Notification Settings page.
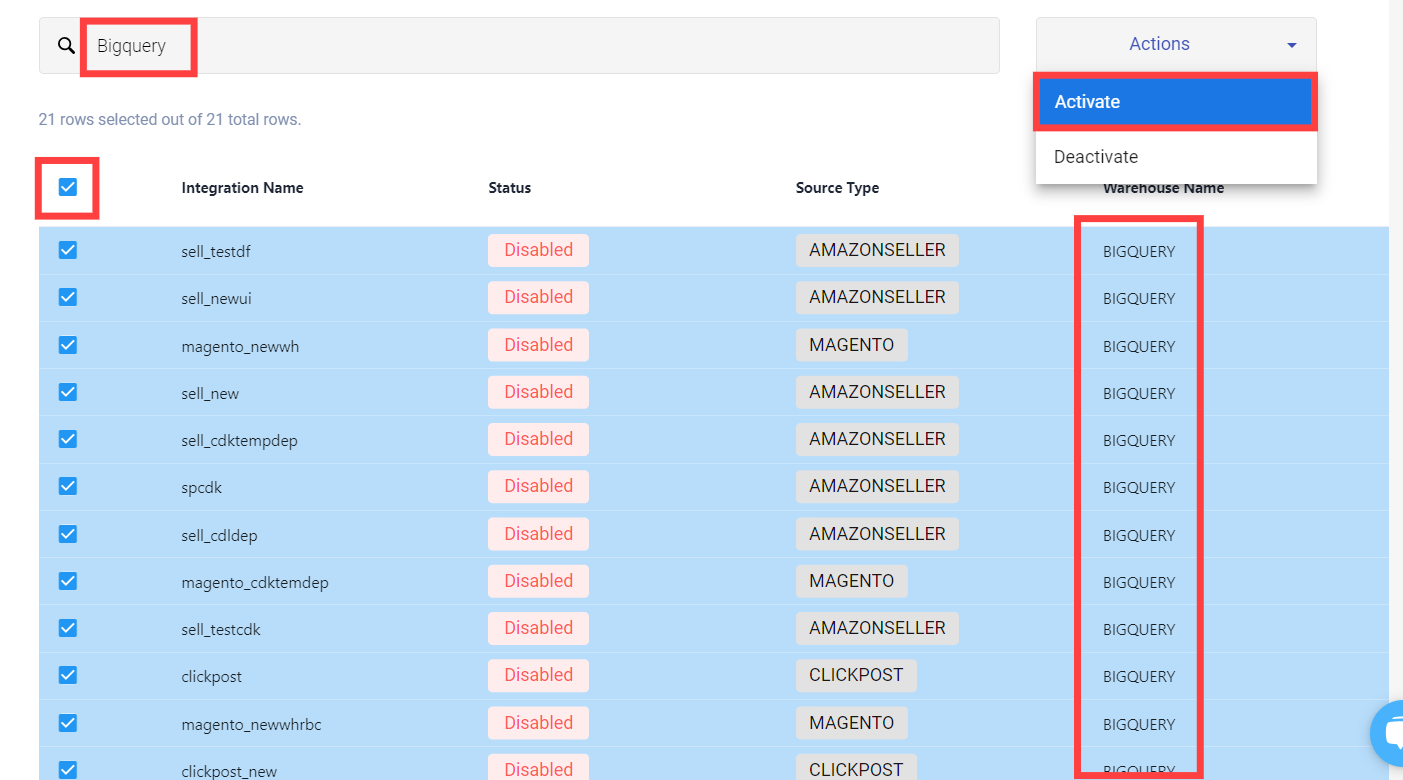
Filtering by Warehouse Type
This action is performed when you need Alert notifications for all the active integrations of a particular Warehouse Type.
- This can be performed by typing the desired Warehouse Type in the search box at the top of the Data Delay Tab on the Notification Settings page.
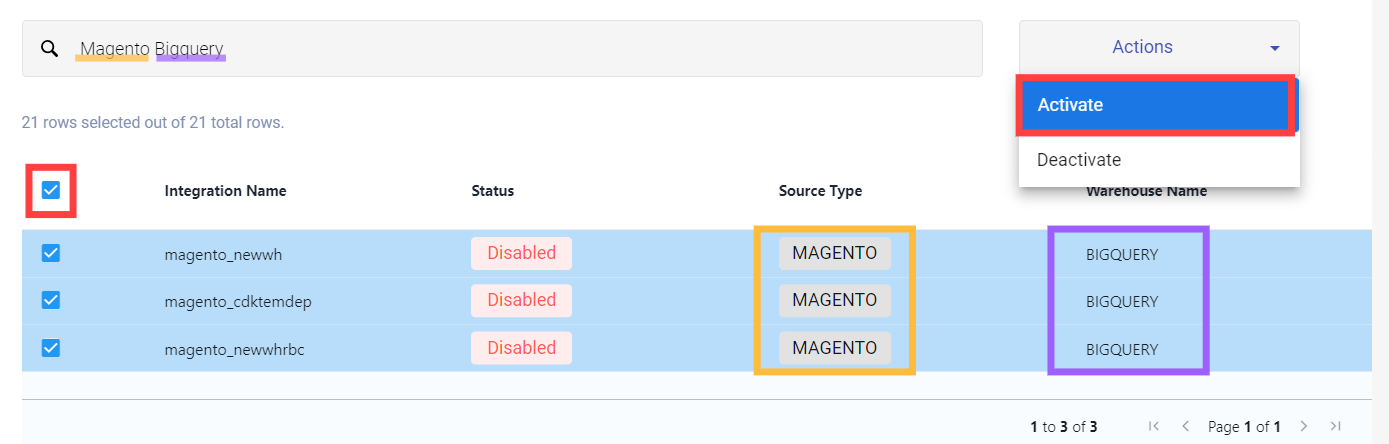
Filtering by Source and Warehouse Type
This action is performed when you desire Alert notifications of a specific Source Type that replicates data to another specific Warehouse Type.
- Provide the desired Source Type and Warehouse Type separated by one or multiple space(s) in the search box at the top of the Data Delay Tab on the Notification Settings page.
Filtering by Source Name as well as Source and Warehouse Type
Similar to the above if you have a range of Integration Names that have similar prefixes and desire to receive the Alert notifications, we can club them with the Source and Warehouse Type filter.
- Type out the the initials of desired Integration Name, Source Type, and Warehouse Type separated by one or multiple space(s) in the search box at the top of the Data Delay Tab on the Notification Settings page.

Note:
- You can also use the combination of any two of Integration Name, Source Type, or Warehouse Type to create filters as you require.
- Do not forget to provide one or multiple space(s) between each of the entities.
Once you have filtered out the required integrations follow the following steps:
- Open the Actions dropdown and select Activate.
- You will receive a popup that says Status Changed Successfully and will observe the status updated as Enabled in the UI.
You will now receive real-time email notifications corresponding to these integrations and the same will be reflected in the Alerts panel.