How to Integrate Razorpay with Daton
This subtopic provides step-by-step instructions to create Razorpay integrations in Daton, detailing the prerequisites, the integration process, and important notes.
How to Integrate Razorpay with Daton
This subtopic provides step-by-step instructions to create Razorpay integrations in Daton, detailing the prerequisites, the integration process, and important notes.
Prerequisites
Before starting, ensure you have an active Daton and Razorpay account.
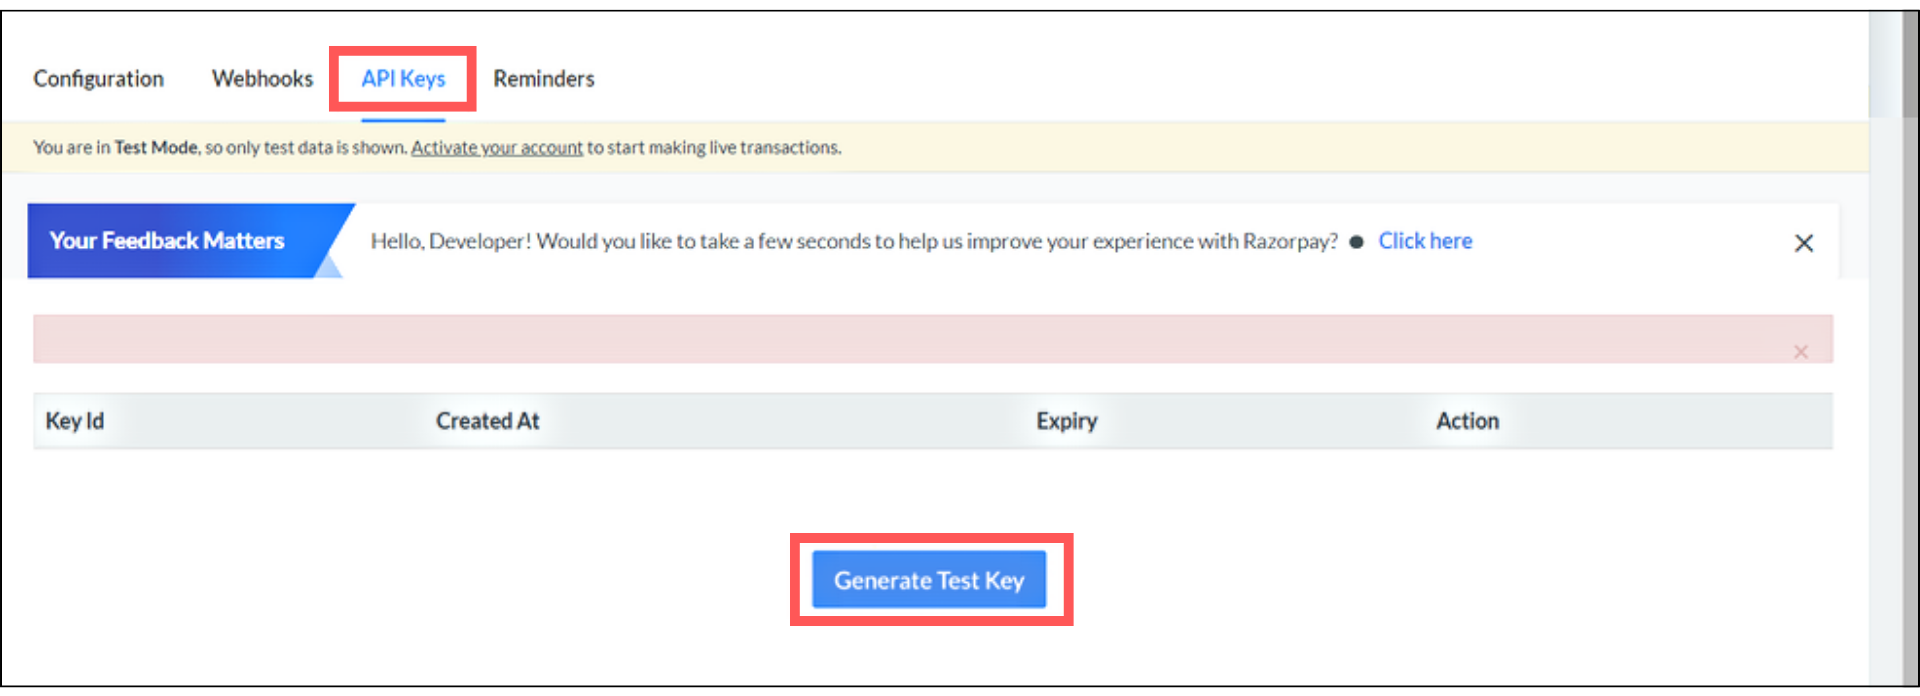
Task 1: Generate an Access token for your Razorpay account
- Log in to your Razorpay account and select Settings on the left menu.
- Navigate to the API section and click Generate Test Key.
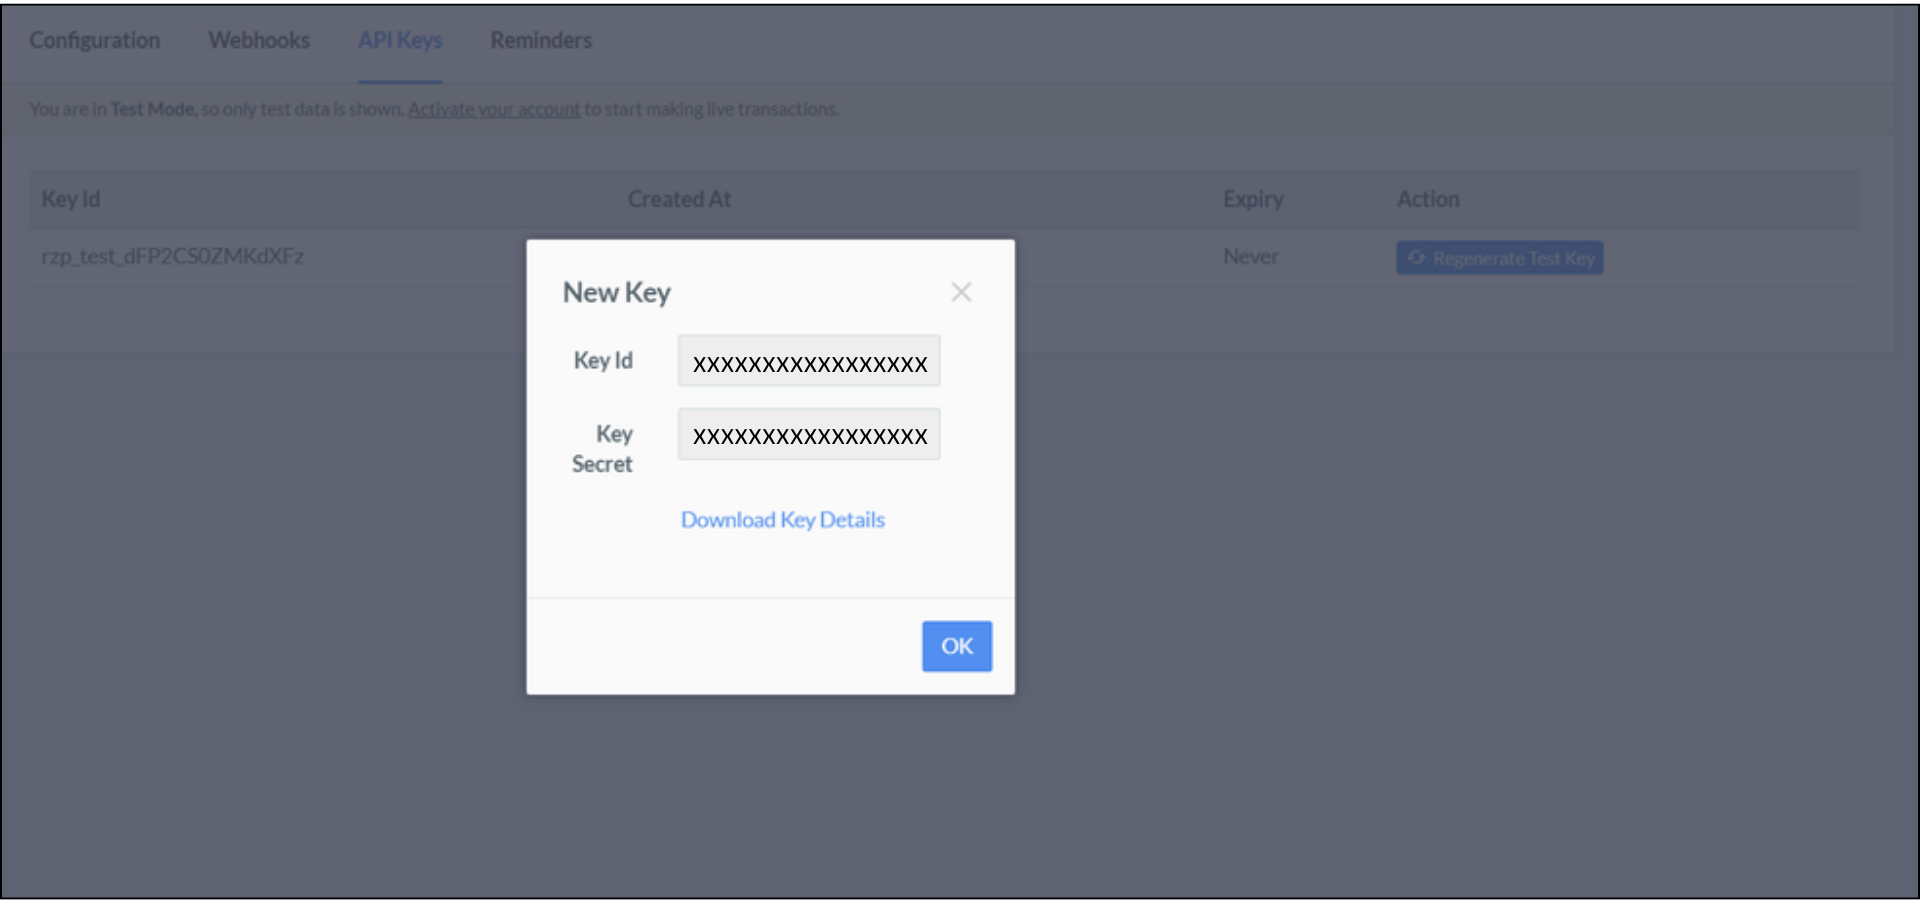
- Your API Key Id and Key Secret will appear on your screen. Save the credentials as they will be used during Razorpay integration with daton and click OK.
Task 2: Integrate Daton with Razorpay Account
- Log in to your Daton account and search for Razorpay in the list of Connectors, then click Configure.
-
Enter the following details and click Authenticate:
- Integration Name
- Replication Frequency
- Replication Start Date
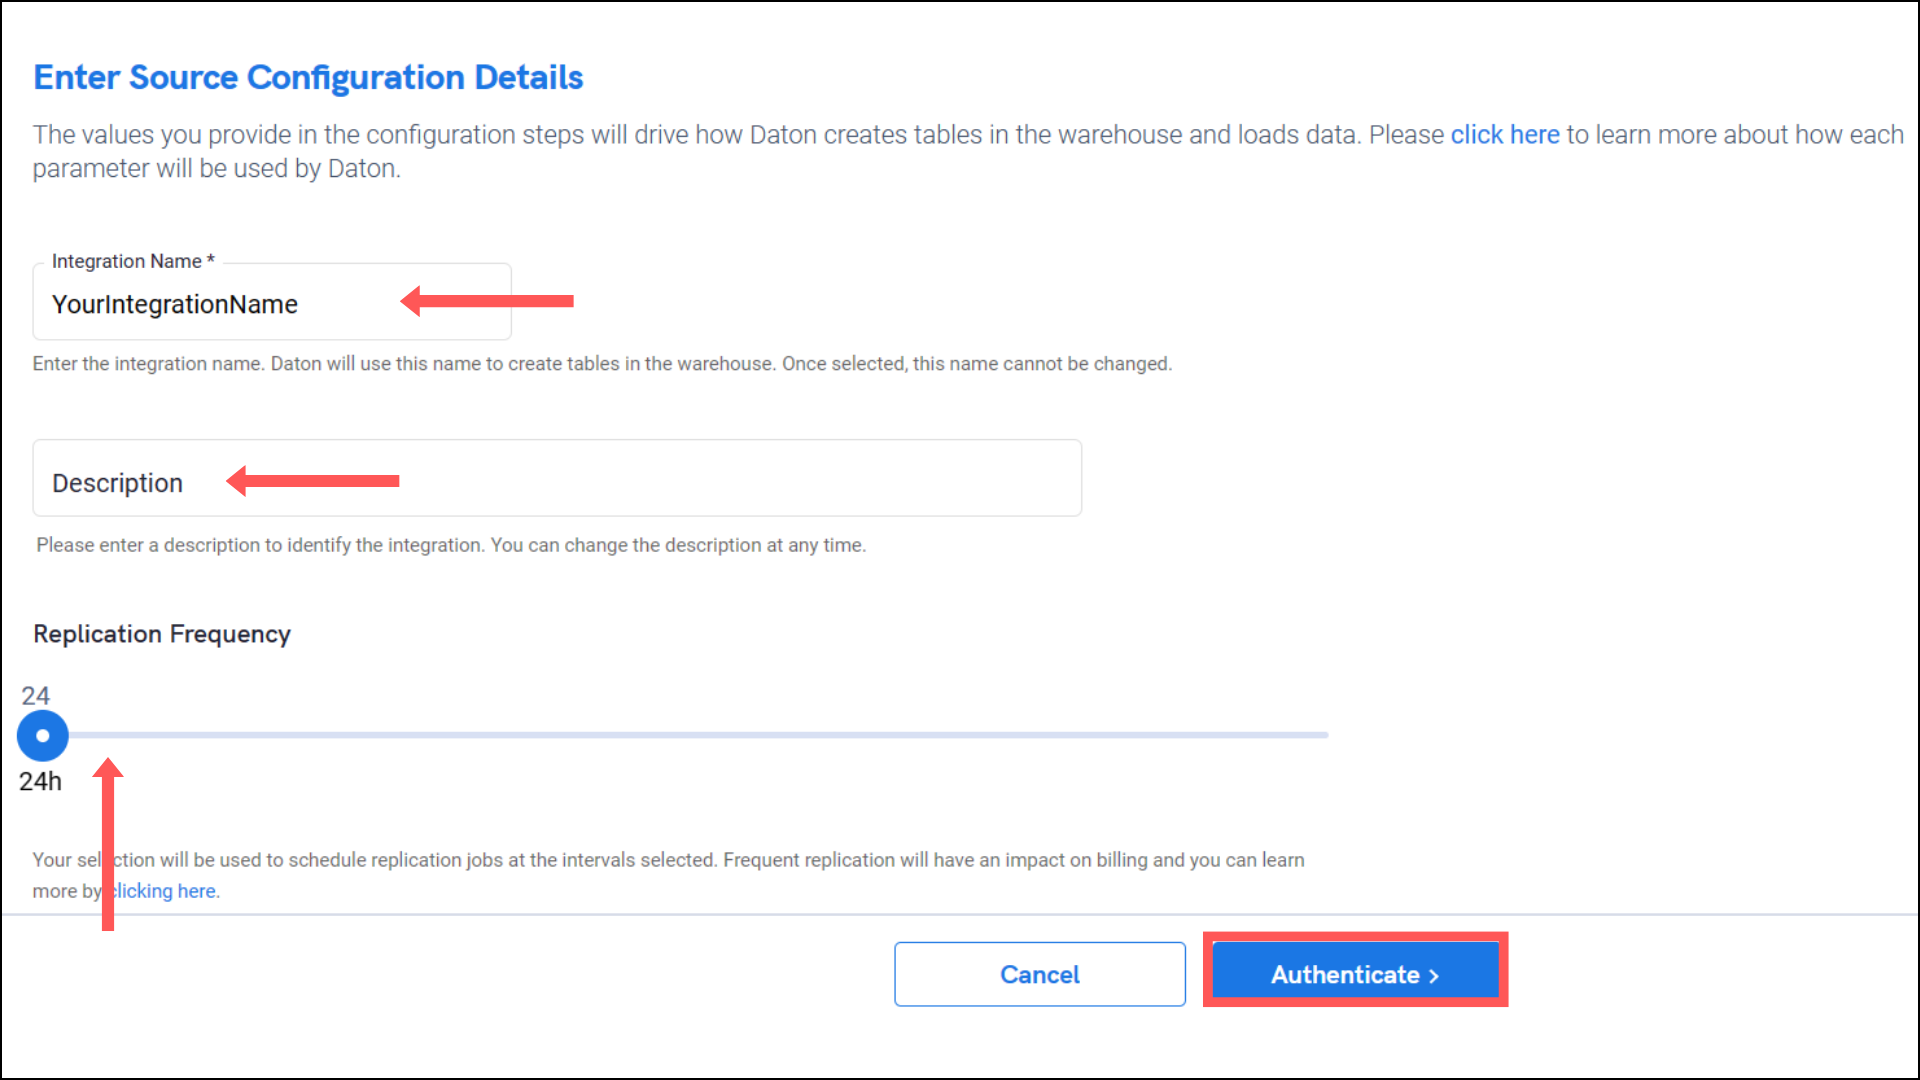
Note that the Integration Name will be used to create the integration tables and cannot be modified later.
-
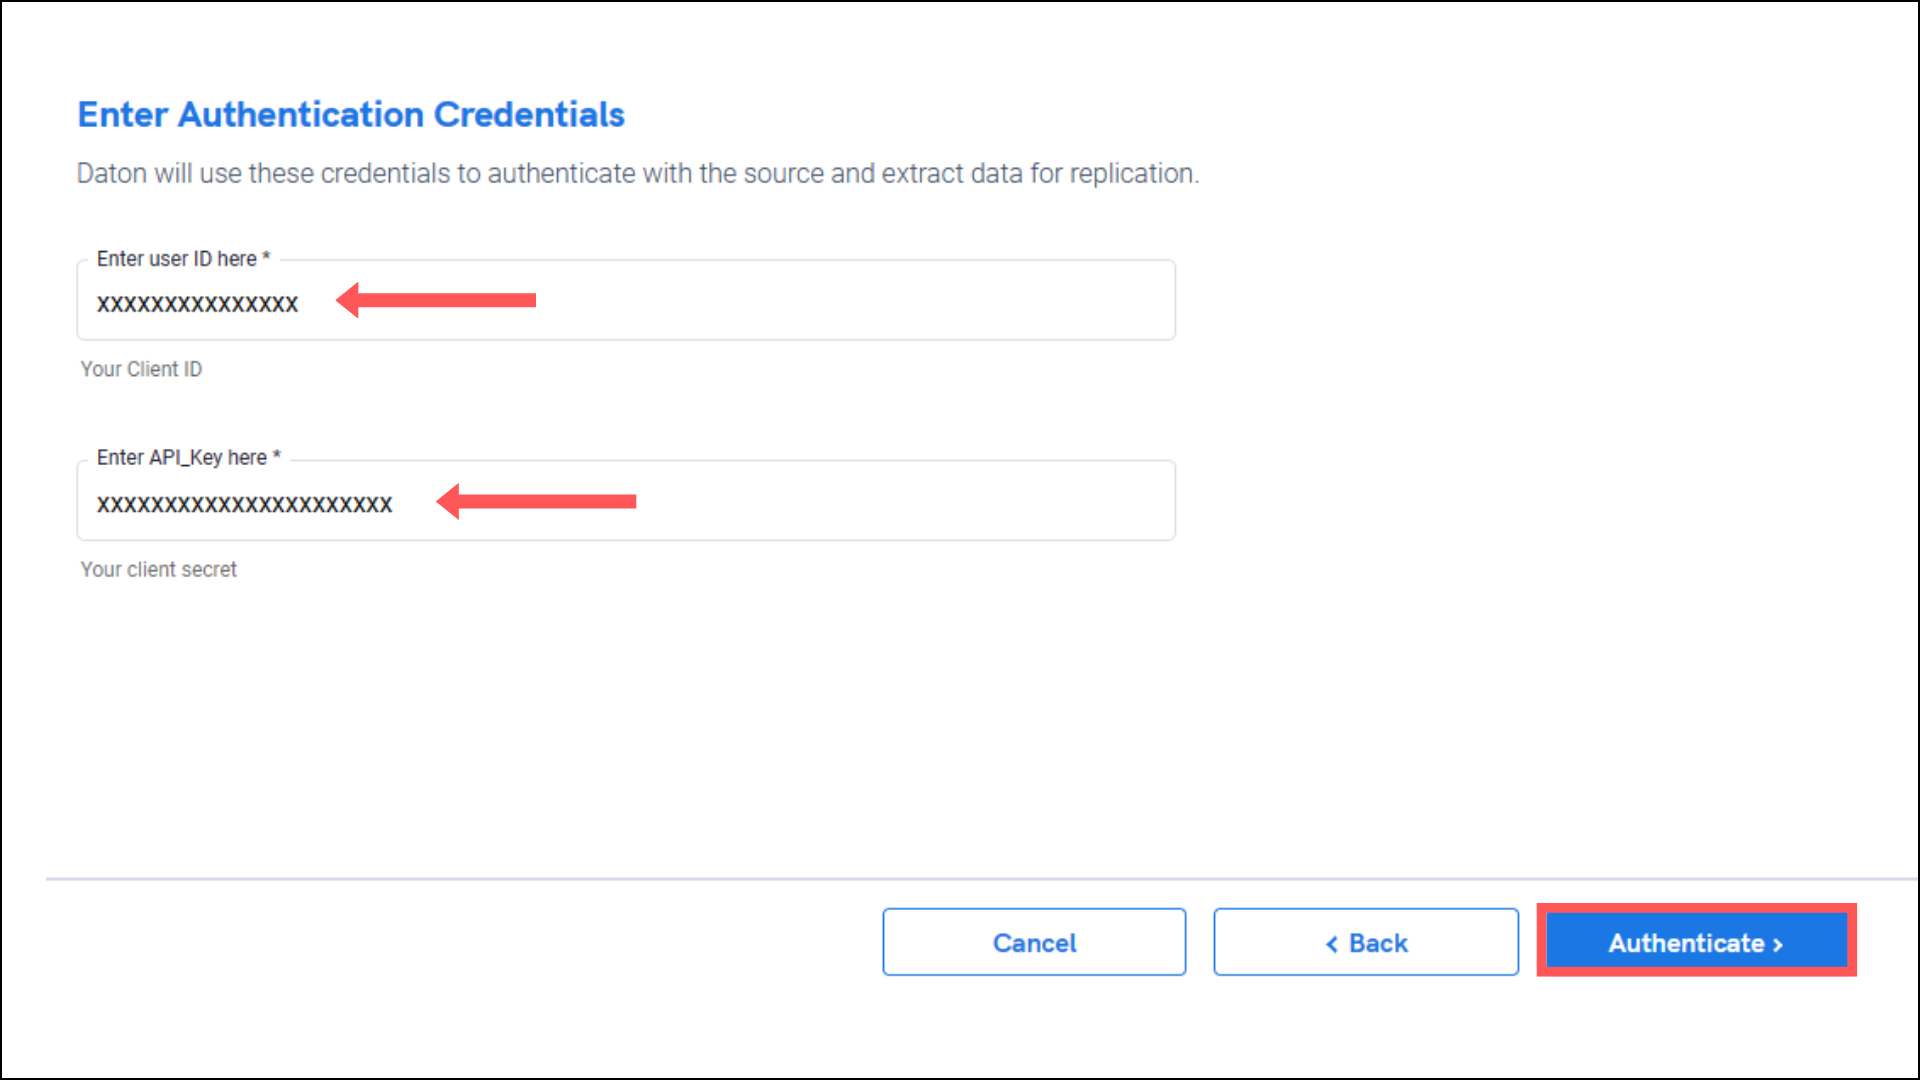
Provide the following Razorpay API credentials to authenticate the integration:
- User ID
- API key
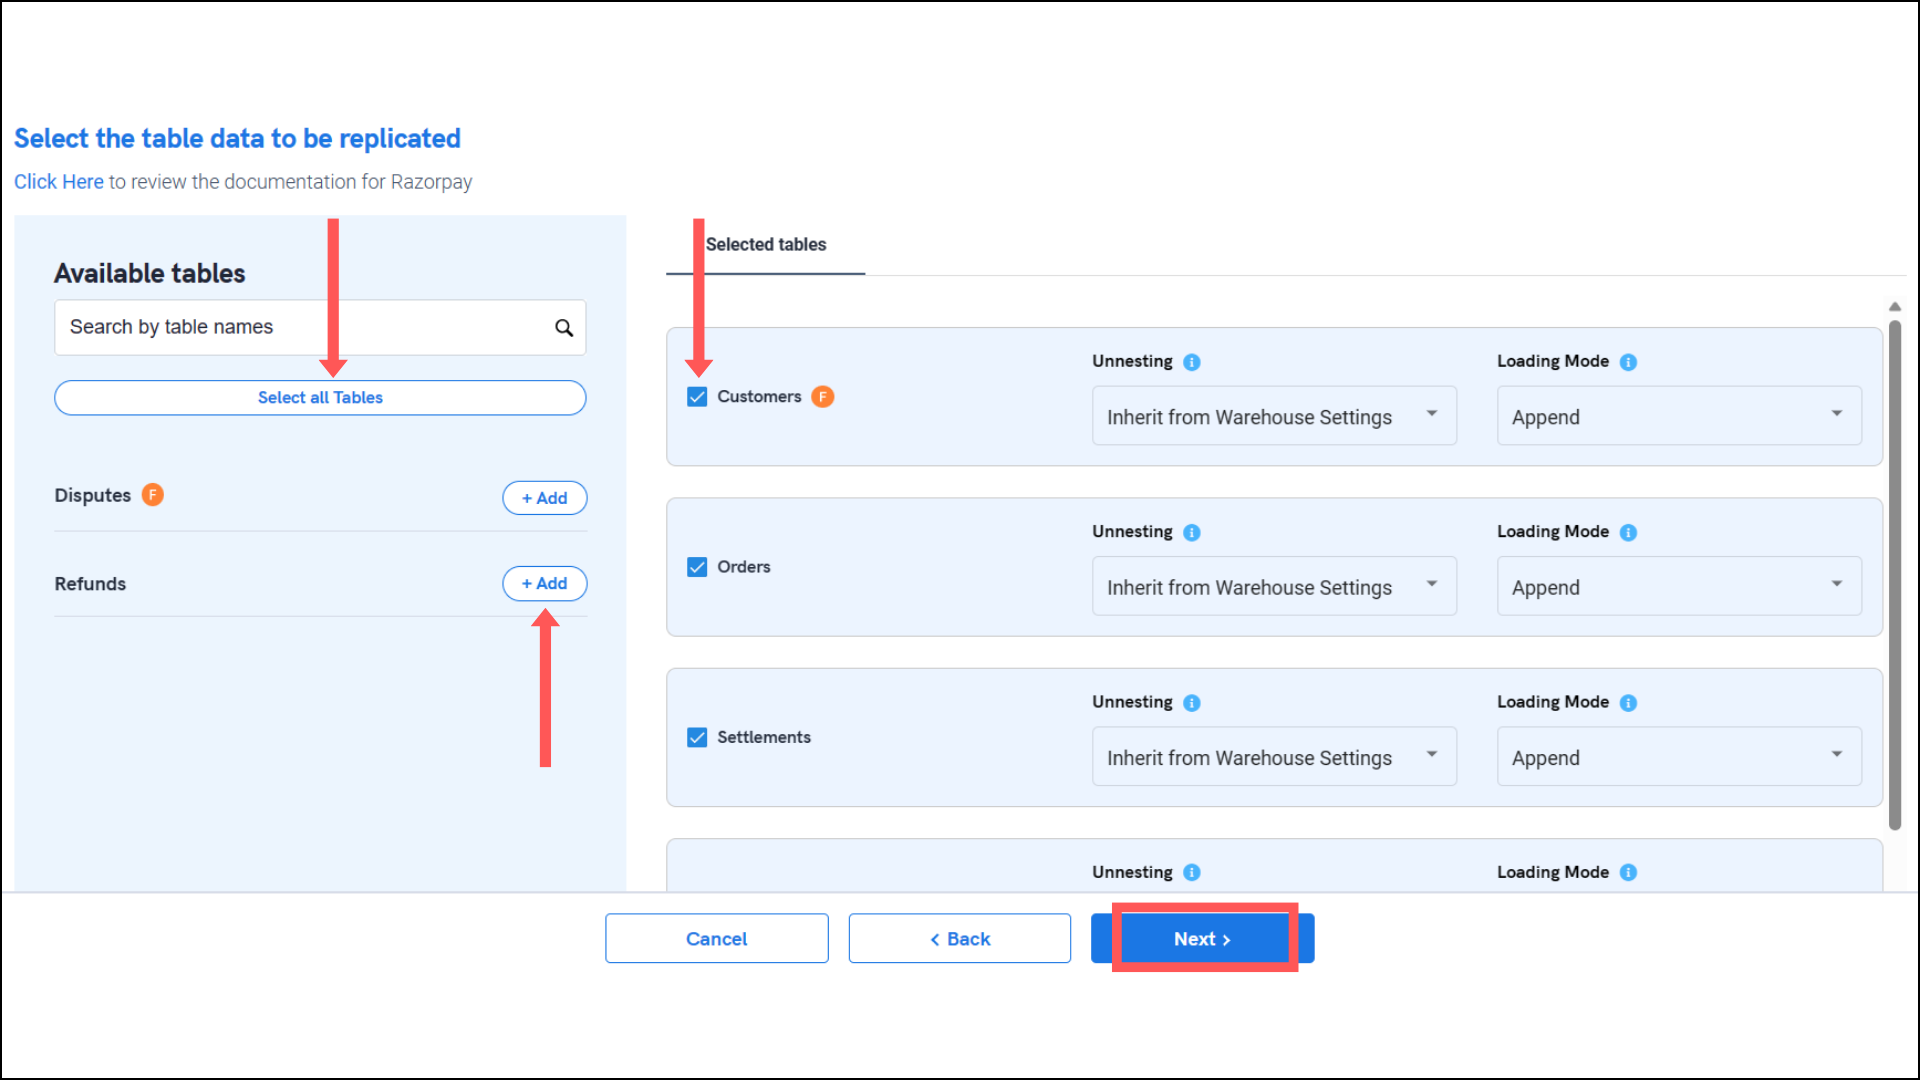
- After successful authentication, you will be prompted to choose from the list of available tables. Select the required tables and click Next.
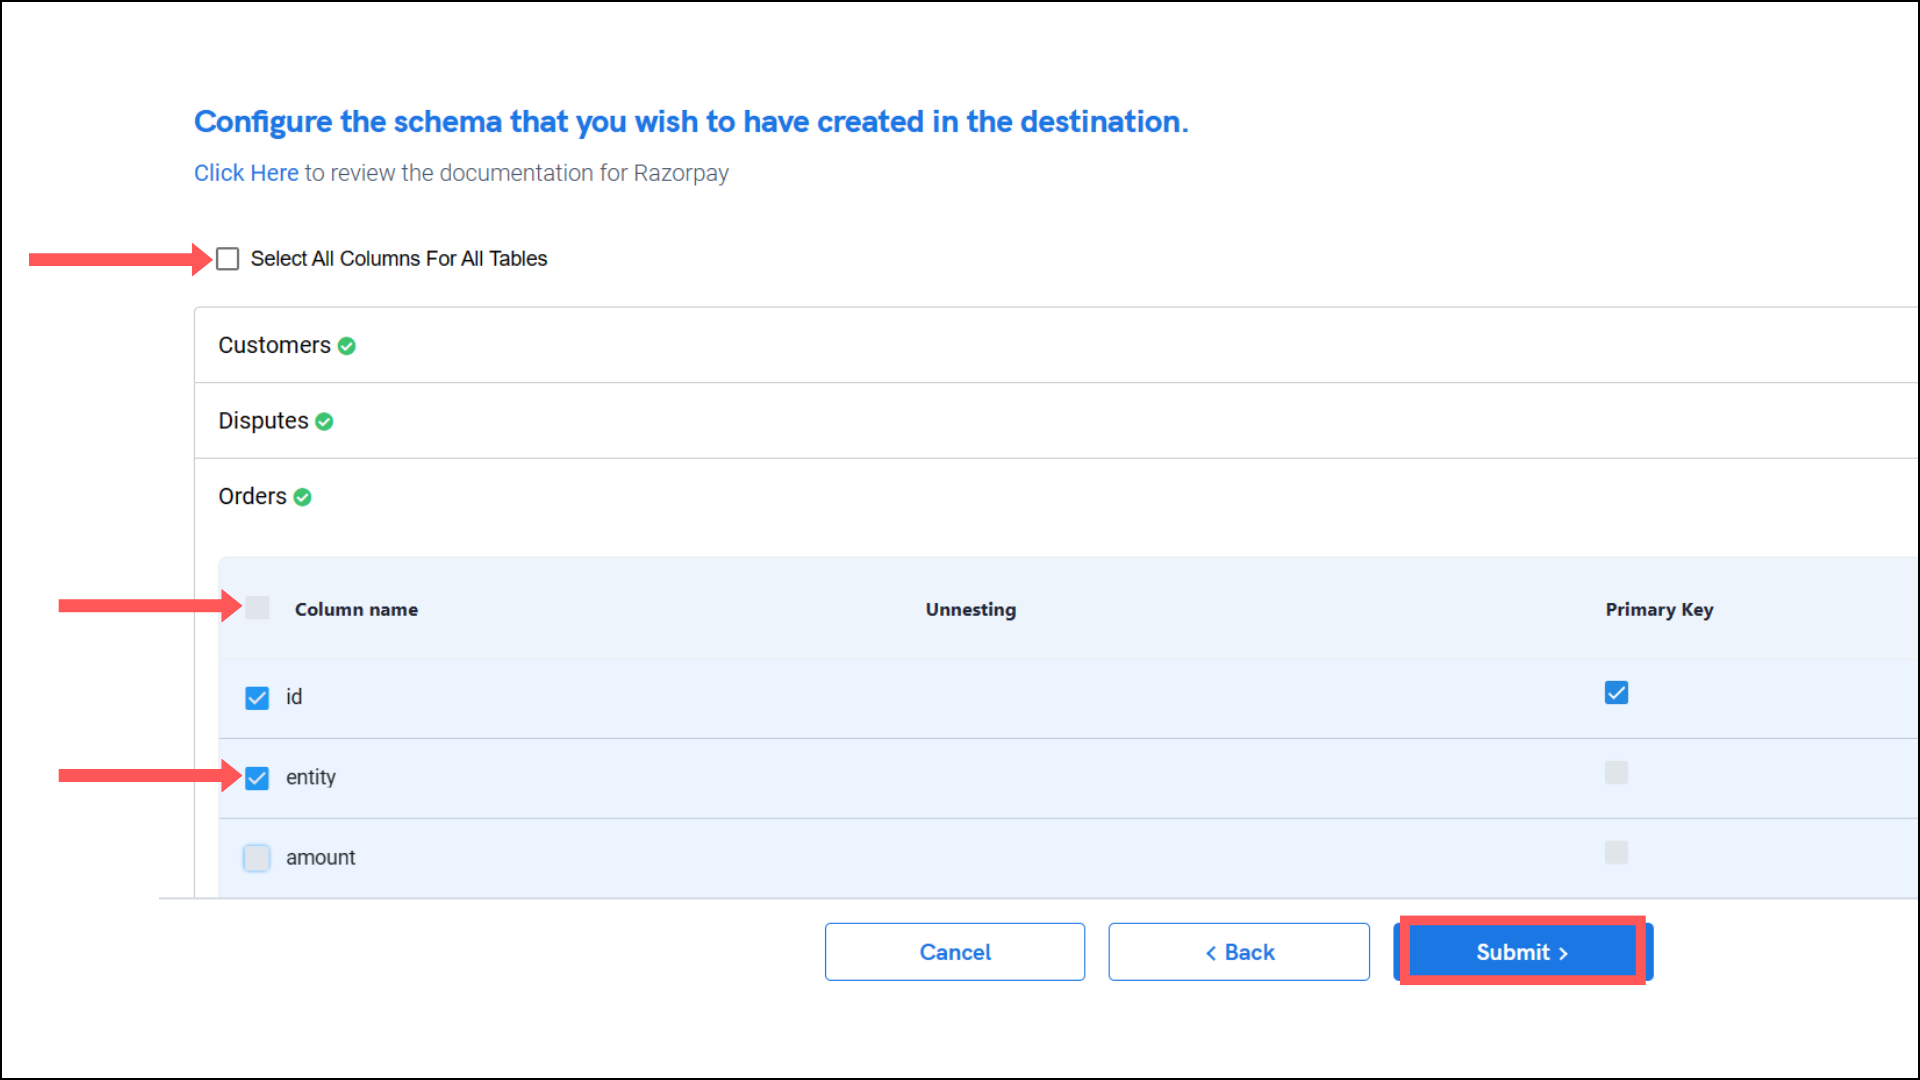
- Select the required fields for each table and click Submit.
Note that you will be prompted to select the destination for your account.
- Select the destination for your store or shop and click Confirm. An integration successful message will be displayed.
Important Note
- Integrations would begin in the Pending state and change to the Active state once the first job successfully loaded data into the configured warehouse.
- Users can check job status and process logs from the integration details page by clicking on the integration name in the active list.
- Users can Re-Authenticate, Edit, Clone, Pause, or Delete the integration at any moment by clicking on settings. You can also adjust the frequency and history of the integration.
- On the Sources page, click Integration to access each table in your integration. The page also shows the state of each table, the last replicated time, and Reload access buttons.