Setup Manual
Setup Manual
Stepwise Instructions to Integrate GCP PostgreSQL with Daton
Prerequisites
- PostgreSQL
- Database name, Hostname and Password
- Port Number (usually 5432)
Integrate your GCP PostgreSQL Database with Daton
- Sign in to your existing Daton account.
- Search for GCP PostgreSQL in the list of Connectors and click on the 'Configure' button.
- Provide the necessary Integration Name, Replication Frequency, and Replication Start Date data and click the 'Authenticate' button.
Please Note, the Integration Name will be used in creating tables for the integration and cannot be changed later.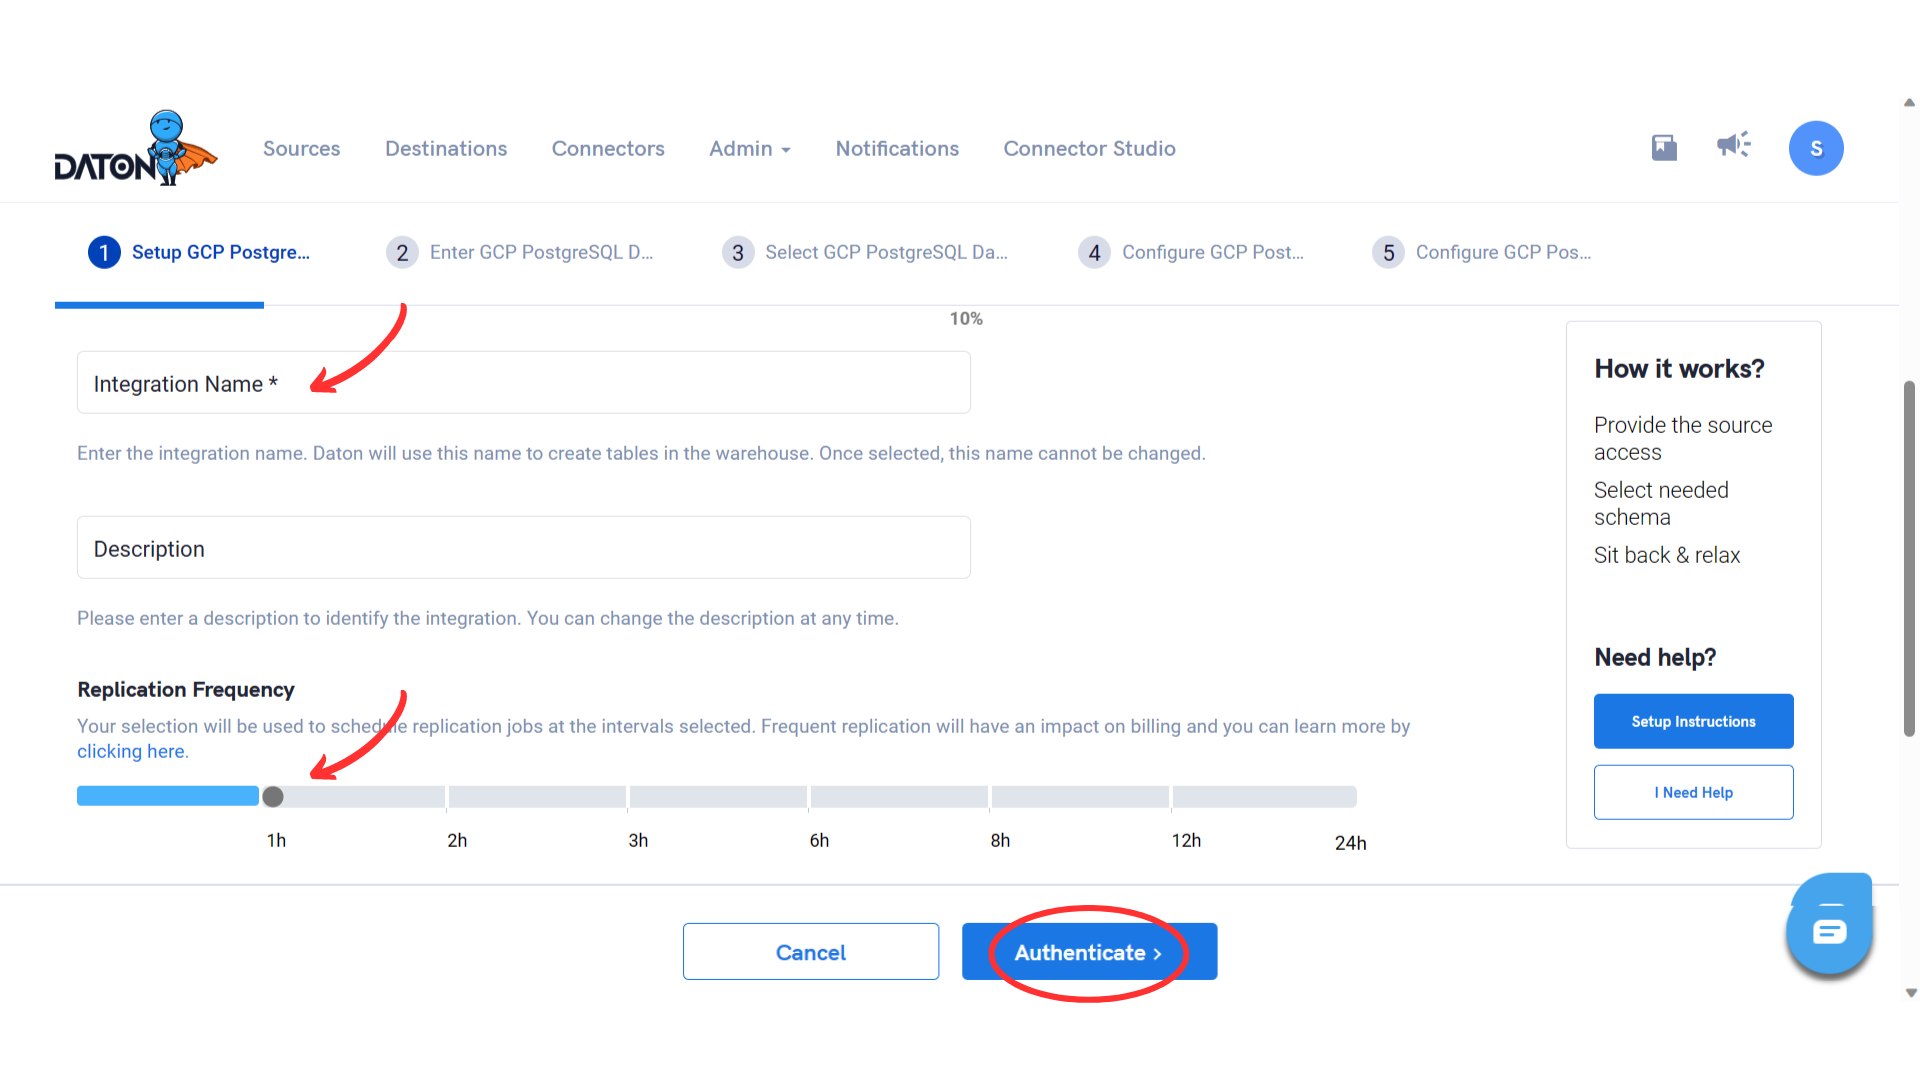
-
Select your GCP PostgreSQL Database Schema(s) data to be replicated. For the same, provide your PostgreSQL 'Database Host Name,' 'Port Number,' 'Database User Name,' 'Database User Password' and the 'Database Name' and click on ‘Next.’
You can also secure your authentication by SSH tunneling. Click here to know how.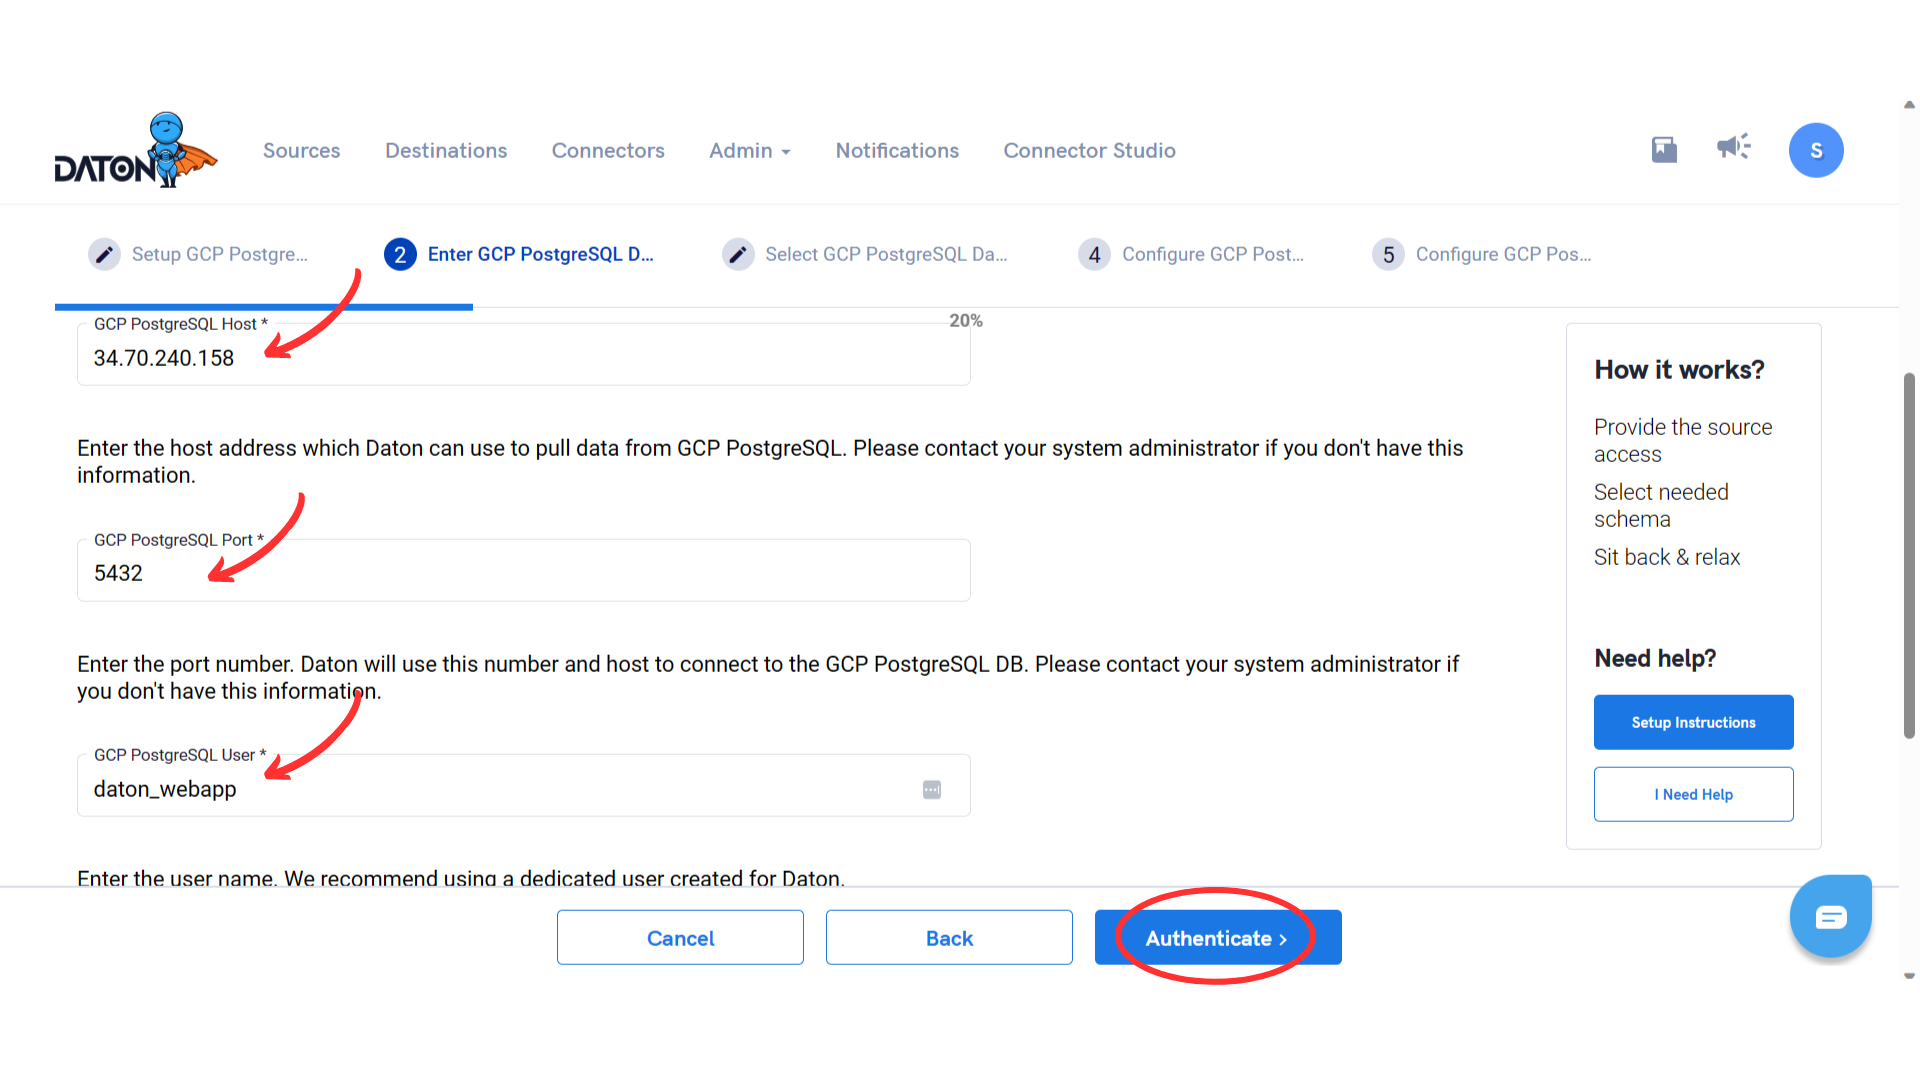
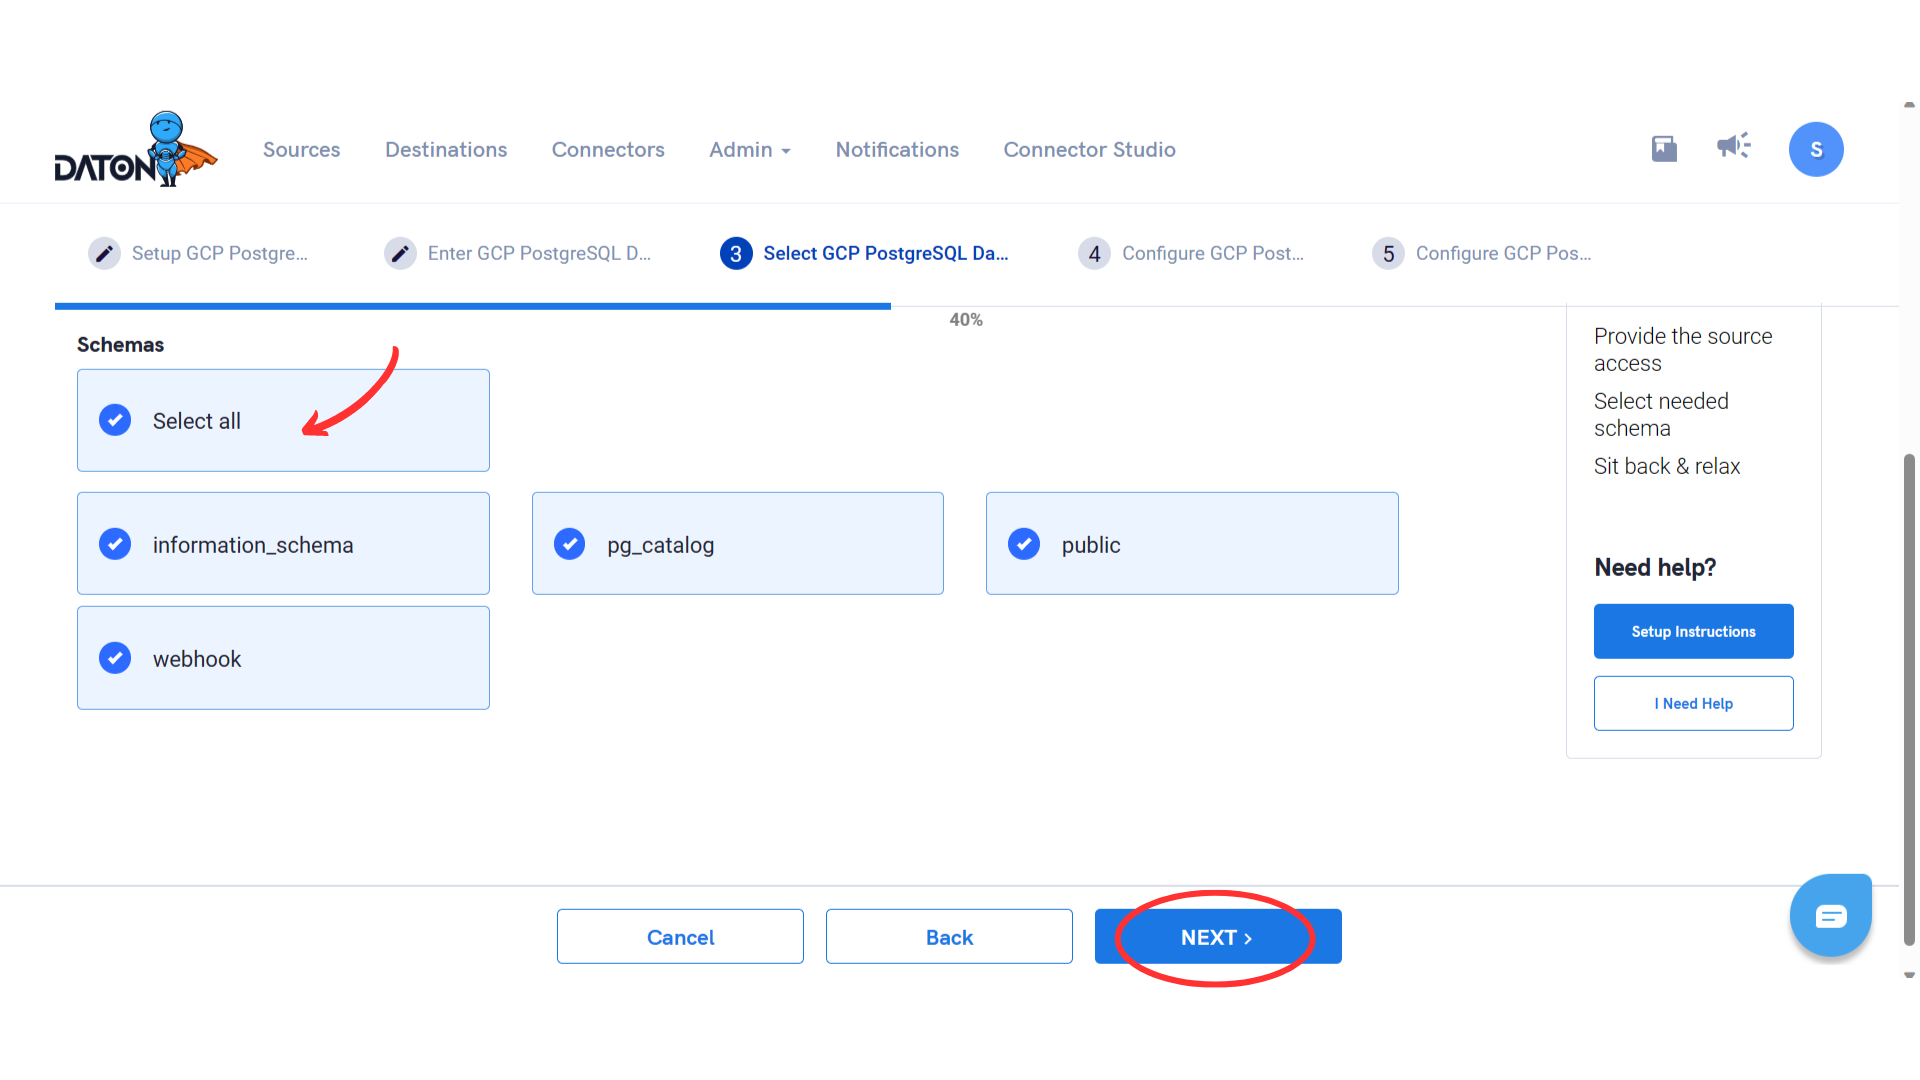
- Post selecting the Database, you will be prompted to choose schemas from the list. Select the desired Schemas and click on ‘Next.’
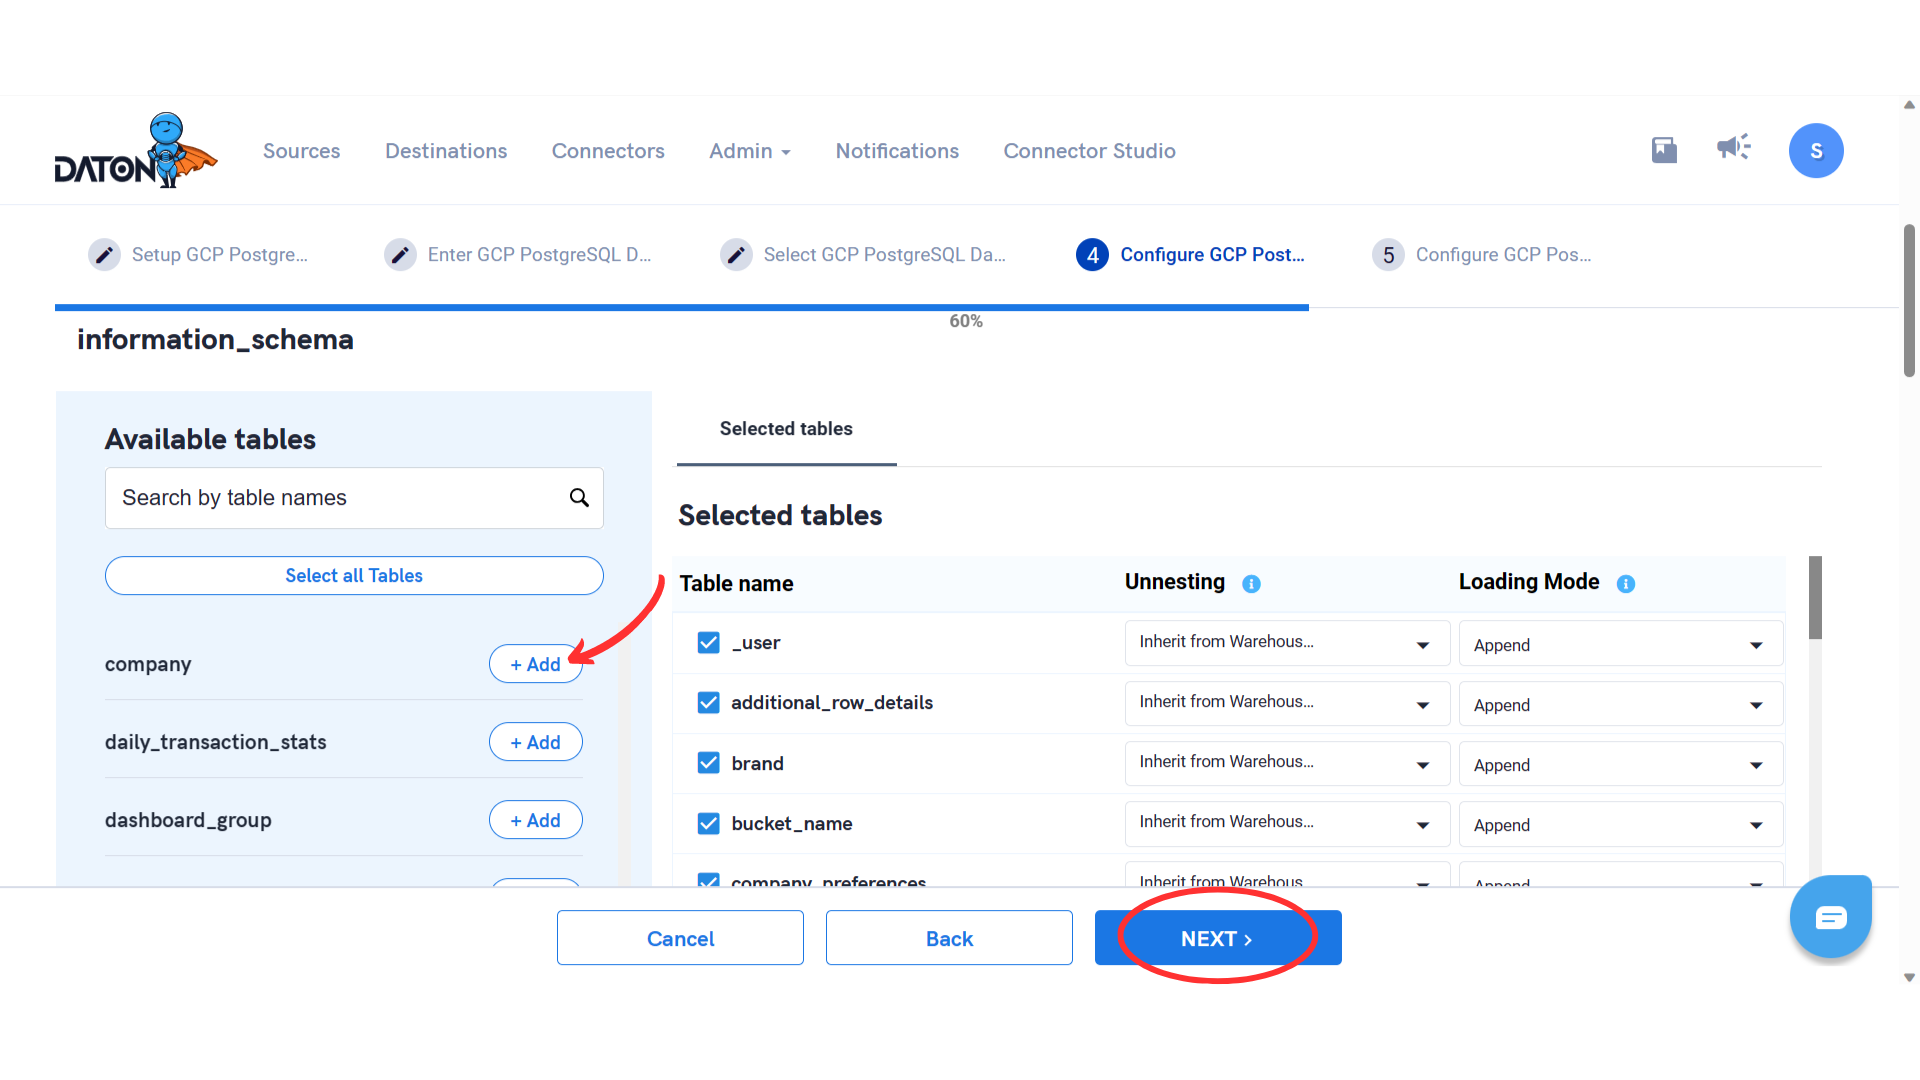
- Now Select all the Tables as per requirement and Configure the schema that you wish to create in the destination before clicking the 'Next' button.
Note:- You will have to check at least one Table from each of the previously selected Schemas to proceed further.
- Now you can customize the replication frequency and replication start date of each desired table separately. You may find this functionality under the advanced settings of every selected table.

- Select all the Columns you require for each table and Submit the integration.
Select the replication field for each table. Selecting 'None' will lead to full table replication. Selection of any primary keys or dates will load data in an incremental manner.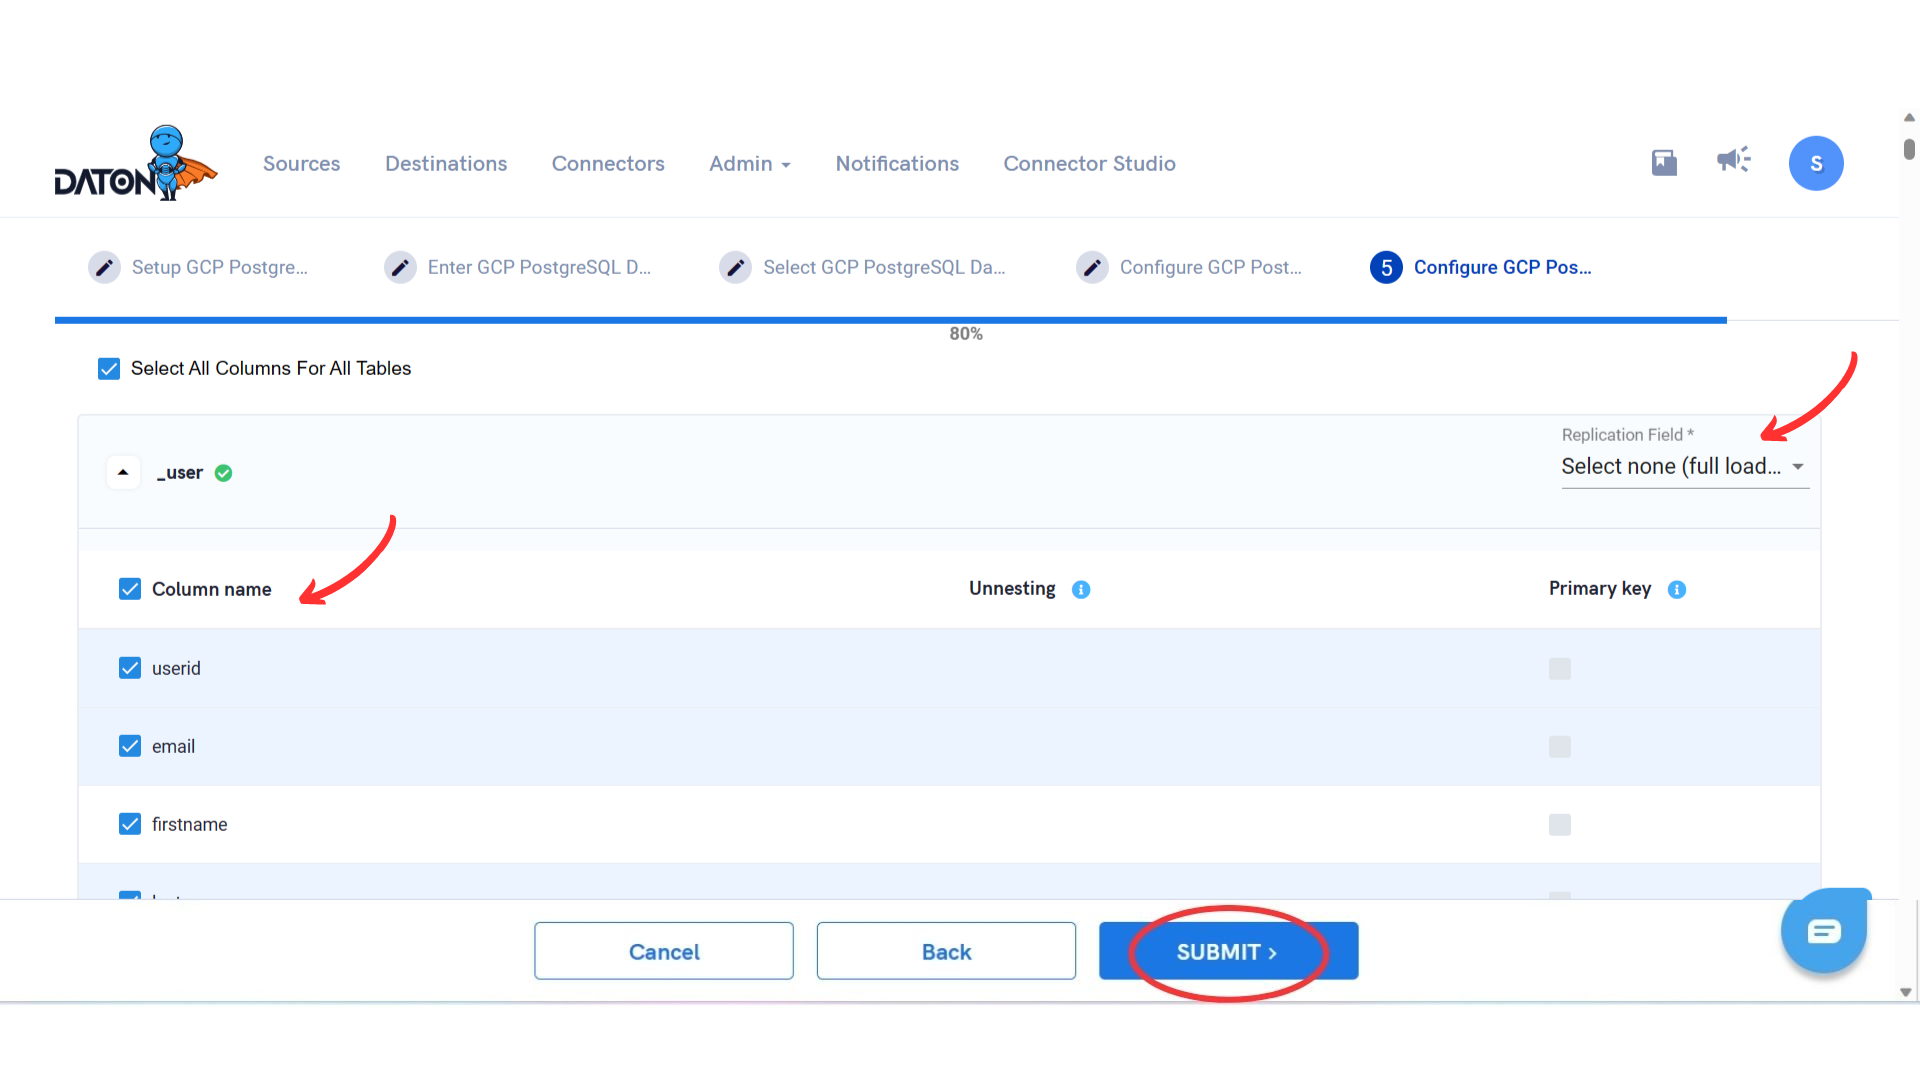
- Once submitted, you will be prompted to select the destination. Select your favorite destination and click on ‘Confirm.’
You will now receive a popup saying 'Integration Successful.'
Congrats! Your Database has been integrated with Daton.
Workflow
- Integrations would be in the Pending state initially and will be moved to the Active state as soon as the first job loads data successfully into the configured warehouse.
- Users can view job status and process logs from the integration details page by clicking on the integration name from the active list.
- Users can Re-Authenticate, Edit, Clone, Pause or Delete the integration at any given time by clicking on the settings
You can also edit the integration to change frequency and history. - Each table in your integration can be accessed by clicking on the integration on the 'Sources' page. Here you may find the status of each table, the last replicated time, and Reload access buttons.
