Setup Instructions for Azure One Lake Database
Setup Instructions for Azure One Lake Database
Setting up access to your Azure One Lake data warehouse is not very complicated and just takes a couple of simple steps.
Follow the steps below to set it up for yourself, if you are stuck somewhere, feel free to contact out support team at support@sarasanalytics.com.
Prerequisites
- To integrate One Lake, you need a Microsoft Fabric and Daton account.
Set up on Azure One Lake
Task 1: Register an Application
- Log in to the Azure portal.
-
In the search bar, look for App registrations.

- Go to App registrations and click New registration.

-
Enter the following specifications for your application in the Register an application section and click Register.
- Name for the App
-
Select Accounts in this organizational directory only under Supported account types

-
Make a note of the Application (client) ID and Directory (tenant) ID that will appear once your application is registered. You will need them to configure Azure One Lake on Daton.

Task 2: Create your Client Secret
- Select the application you registered in the above Task.
-
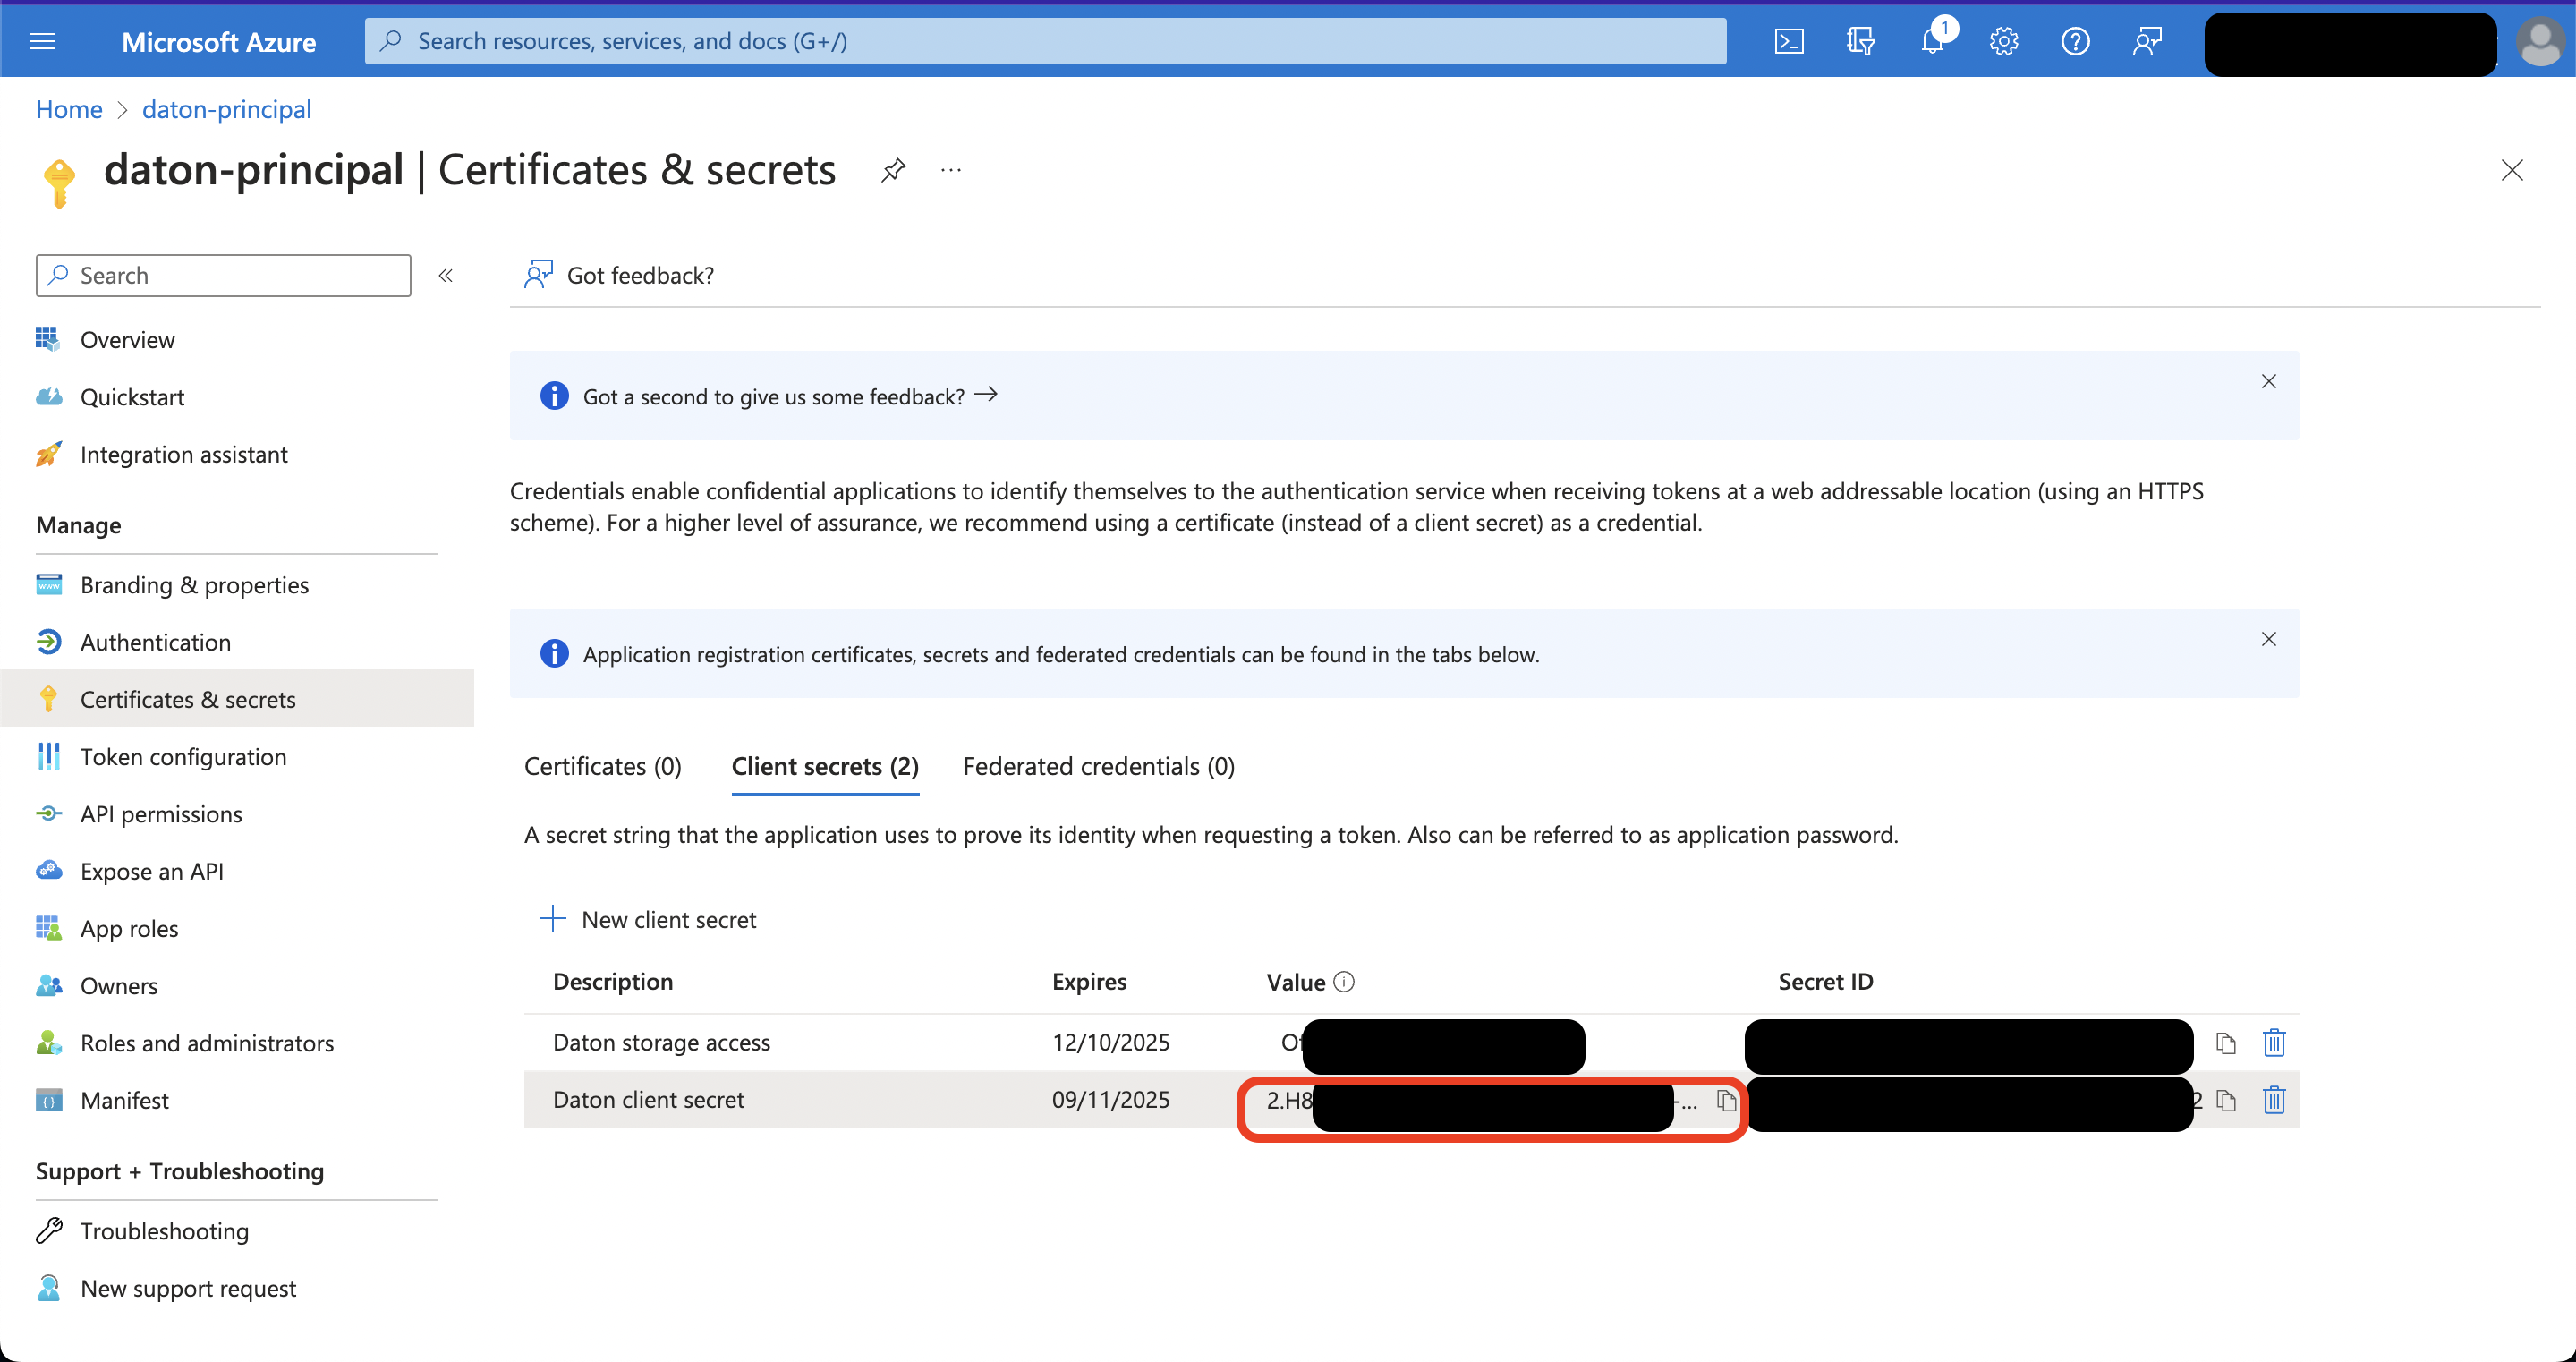
On the navigation menu, click Certificates & secrets and then click New Client Secret.

-
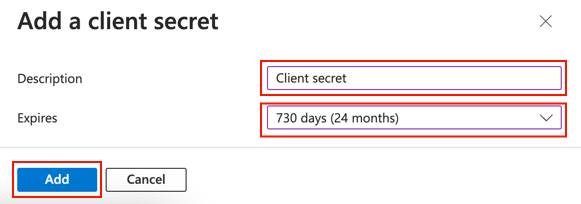
In the Add a client secret pane, enter a Description for the client secret, set the expiry time to 730 days, and click Add.

- Copy the client secret that you just created. You will need it while integrating your db into Daton.

Task 3: Create workspace
- Log in to your Microsoft Fabric account.
-
Click Synapse Data Engineering.

-
Navigate through Workspaces and then click New Workspace.

- Enter a Name for your workspace and click Apply.

Task 4: Add service principal to the workspace
-
Select the workspace you created in Task 3 and then click Manage Access.

-
Click Add people or groups and specify the name of the service principal you created in Task 1.

- In the drop-down menu, select Contributor and click Add.
Task 5: Create Lakehouse
- On the navigation menu, click Create.
-
In the Data Engineering section, locate and click Lakehouse.

- Provide a unique name for your lakehouse and click Create to initiate the creation process.

The steps laid out earlier in the document are a pre-requisite before you start configuring Azure One Lake as a destination in Daton.
Set up on Daton
1. Log in to your Daton account and navigate to the Destinations page.
2. Click the Add New Destination button and select Azure One Lake from the list of options.
3. Enter the Integration Name and click Next.
Provide a unique name for your Azure One Lake integration. This name will be used to create tables in the data warehouse and cannot be modified later.

4. Enter the following details to configure the connection to your Azure One Lake database and click Next.
- Workspace Name: Add a unique name for your Workspace in Daton.
- Azure One Lake Lakehouse Name: Add the Name of your Lakehouse as added in Task 5.
- Azure One Lake Object Key Prefix: Add a name of your choice. This will be used to generate the file name in One Lake.
- Azure One Lake Tenant ID: Add your Tenant ID as obtained in Task 1.
- Azure One Lake Client ID: Add your Client ID as obtained in Task 1.
- Azure One Lake Client Secret: Add your Client Secret as created in Task 2.

5. Select the Additional Key Elements option and click Submit.
- If Yes, Select Optional Key Elements from the dropdown menu.

- If No, proceed.

- Select the Object Format of your choice from the dropdown menu.

Now hit the Submit Button. A message will confirm successful integration.
Your Azure One Lake database is now configured as a destination in Daton.
